Fixing forward head posture index
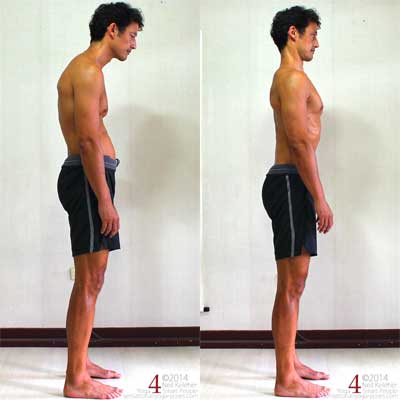
Rather than just trying to hold the correct posture, with head balanced on top of my neck, I practice moving the necessary elements of my body in and out of the desired position so that I learn to feel my body and control it. I can then work at moving my body gradually into a position of good posture with a minimum of effort by feeling it. It then becomes easier to hold good posture (and prevent forward head posture) for longer and longer periods of time.
I still do have a head forwards posture some of the time, but now I find it easier to move into good posture and hold it without too much physical or mental effort.
Exercises for the ribcage and exercises for the neck
The exercise that I do and teach comes in two main parts.
- The first part involves rhythmically moving and shaping the thoracic spine and ribcage.
- The second part involves moving the head and shaping the neck.
The following exercises for improving posture have a rhythm.
I use the word rhythm because when the right movement rhythm is found the movements themselves can feel quite nice, meditative. That means you'll be more likely to want to do them. In the process you train yourself in good posture and you may find that you can carry the same feeling (from the rhythmic movements) into holding good posture.
The basic movement actually starts with a movement of the pelvis.
I start with this movement because generally I find it tends to be a reasonably succesful method that then makes it easier to feel the ribcage.
When I start with a focus on just the ribcage I often find students don't get it, or take some time to get it.
And so it is easier to simply start with movements of the pelvis (with the added bonus that you increase awareness of your pelvis.)
You also get to mobilize both the lumbar spine and the thoracic spine, and that's not a bad thing.
So to begin with sit on a firm chair far enough forwards that your back isn't touching the back rest and with your feet about shoulder width apart and slightly behind the knees.
You can adjust your foot position for comfort, however try to keep the shins vertical when viewed from the front, rather than letting your knees flop out to the side.
Hands can rest on your thighs or if you are in front of a desk or table, on the surface in front of you.
Lifting and lowering your sacrum
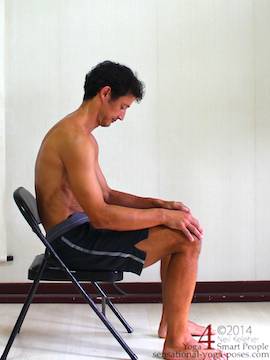
Focus your attention on your sacrum and slowly lift it so that your pelvis rocks forwards. Then slowly lower it. So that your pelvis rocks back.
Notice how your lumbar spine bends backwards as you lift your sacrum and how it bends forwards as you lower you sacrum.
Repeat this movement a few times.
Each time, just before you change direction, come to a gradual stop.
Imagine a pendulum that gradually pauses before gradually swinging in the opposite direction. However, make peak speed slower than that of a pendulum.
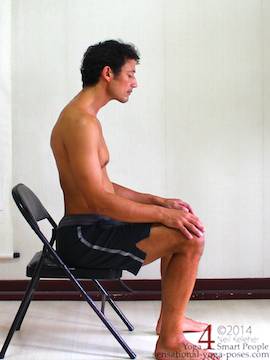
Once you are comfortable with the above basic movement, focus on bending your thoracic spine as well as your lumbar spine.
Then as you do so, notice how your chest lifts and opens as you bend your thoracic spine backwards.
Notice how your chest sinks when you bend your thoracic spine forwards.
Sink your chest fully (then lift it as high as possible)
When you sink your chest, try to sink it fully. Roll your sacrum as far down as possible so that you are fully slumped.
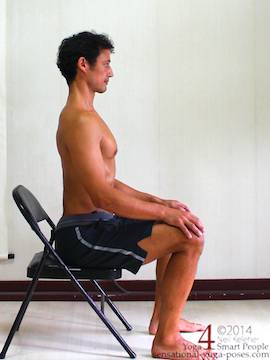
Then slowly sit up and as you begin the back bend of the thoracic spine work at gradually lifting the fronts of your ribs as high as possible.
Focus on the front corners of the ribs and each time you lift the ribs imagine you can lift them incrementally higher.
You aren't looking for a huge increase. Instead just look or feel for ways you can lift your ribs a little bit higher each time.
When relaxing look for space to sink your ribs deeper.
Taking your spine through a large range of motion
Part of the idea of this exercise is to take your lumbar spine and ribcage through as full a range of motion as possible. Also it is to give you a good feel for these two elements.
Generally the larger a movement is the easier it is to learn to feel the parts that are moving.
Next it is time to add head and neck awareness.
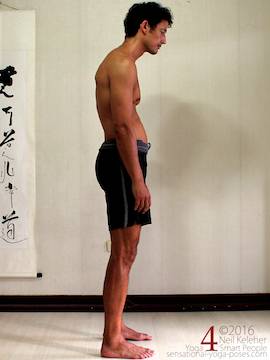
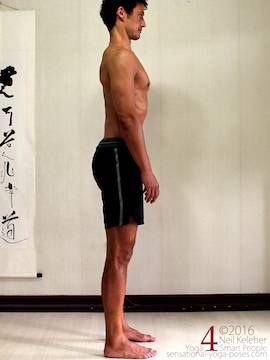
As you lift your chest pull your head back and up.
Use your ear holes as references
The normal tendency for a lot of people is to lift the chin. Try focusing on your ear holes. Pull your ear holes back and up as you lift your chest. Ideally your head will stay level.
When relaxing the chest let your head sink forward and down.
Using the back of your head as a reference
Another option is to focus on the back of the head, at about the same level as the ear holes.
Focus on pulling this part up and back like someone had hooked their fingers their and was pulling your head back and up.
You could also sit in front of a wall and with your back against the wall as you lift your chest, focus on pulling the back of your head up and back towards the wall.
Work at gradually pulling your head back and up
Try to avoid excessive straining. Instead each time work at gradually increasing the amount you move your head back and up.
And then work at reducing the effort required to do so.
Once you have a feel for both actions, try to synchronize the movement of your chest and head so that as your chest lifts it allows your head to move back and up.
As your head moves forwards allow your chest to sink down.
You may find that as you pull your head back and up you naturally inhale since you are expanding your lung volume while when you sink your head and chest you naturally exhale.
The next challenge is breathing naturally or easily while holding good posture.
The next exercise is a breathing exercise to help counter forward head posture and to hopefully help you relax if part of the cause of head forward posture is excessive tension.
Sit in a head forward position with your ribcage sunk down so that your belly is relaxed.
As you inhale expand your belly.
As you exhale pull your belly back towards your spine.
Once you get the basic movement work at making both actions smooth.
What you may find gives you better control is slightly resisting the movement of your belly outwards and then resisting the movement of your belly inwards.
Keep your chest sunk down. This is to make it easier to move your belly inwards and outwards.
Resisting the movements
You can play with resisting both movements and also with just smoothly and gradually relaxing one action as you do the other action. And so as you expand the belly you can focus on gradually relaxing the belly and as you pull the belly inwards you can work at gradually relaxing the downwards pushing element that resists.
Once you are comfortable with the basic movement focus on the area at the bottom of your lungs. Try to feel the respiratory diaphragm which supports the lungs and heart from beneath (and from which the liver, stomach, spleen and kidneys are suspended from.)
See if you can feel it pushing downwards to expand the belly and then see if you can feel it being pushed upwards into the ribcage as you pull the belly inwards.
Belly breathing while sitting more upright
Next try the same action but sitting slightly more upright. It may be a little bit harder because you are adding tension to the belly. Eventually work towards practicing it while sitting upright with the head pulled back and up.
An exercise you can play with is to gradually expand the belly as you bend your spine backwards and as you pull your head back and up.
For this next exercise, it helps to know the difference between your lower belly and your upper belly. If you place a hand on your belly with the pinky side of the hand just above the pubic bone, the part of your belly covered by your hand is your lower belly. The border between lower belly and upper is generally a couple of inches below the belly button.
Controlling your lower belly while breathing
For this next breathing exercise, hold the upright position. Keep your chest lifted and your head pulled back and up. As you begin each inhale pull your lower belly inwards slightly.
Do allow your upper belly and front ribs to gradually expand while inhaling. Gradually relax your lower belly while exhaling.
Note that your upper ribcage and head will move slightly as you breath with this method but that is fine.
There are several things that you can adjust with this exercise:
Play with the amount of tension you use in your lower belly. Also play with the amount of spinal movement, ribcage movement and head movement you allow while breathing with the suggested criteria of looking for a breathing action that
- feels comfortable,
- is relatively effortless and that
- makes it as easy as possible refrain from forward head posture.
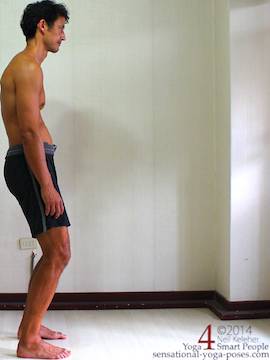
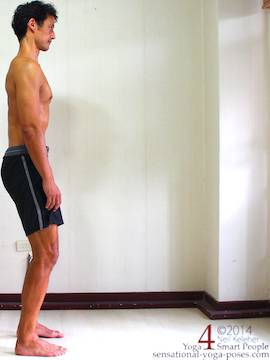
Once you've got the feeling of this type of breath and posture while sitting see if you can find the same "good" posture while standing.
It may help if you stand, to begin with, with knees slightly bent. Once you get the action with knees bent, try it with knees straight.
Check out slouch to zero slouch exercises to fix your posture
So that you can refrain from moving into forward head posture while working in front of a computer, see if you can relax your eyes more. Either make the text or images bigger on your computer or just practice focusing from further back. Try to keep your chest open and lifted with minimal effort while balancing your head on your neck, again with minimal effort.
And if you forget, don't worry about it. Instead take a rest, practice the above exercises and try to carry the feeling with you as you go back to work.
The same slow and smooth rhythmic style of movements are used to improve awareness and control of your spine, shoulders, legs and feet.
