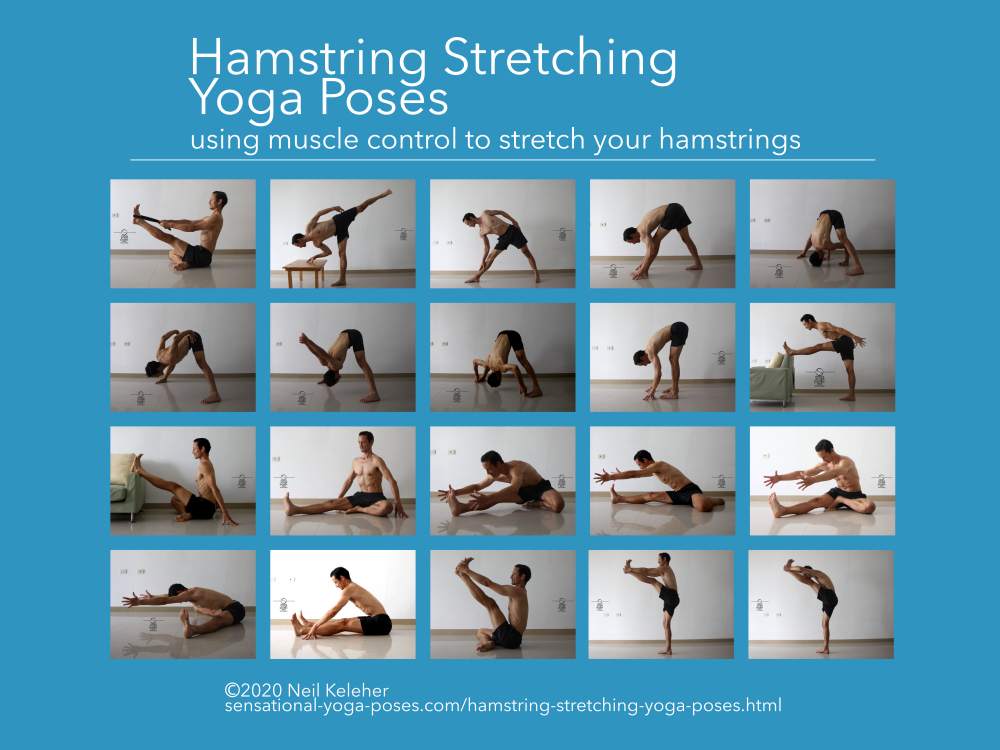
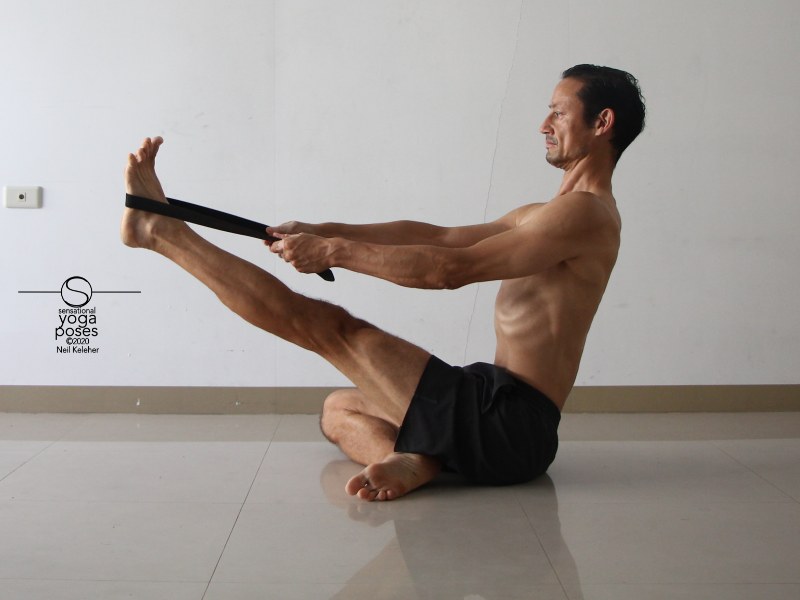
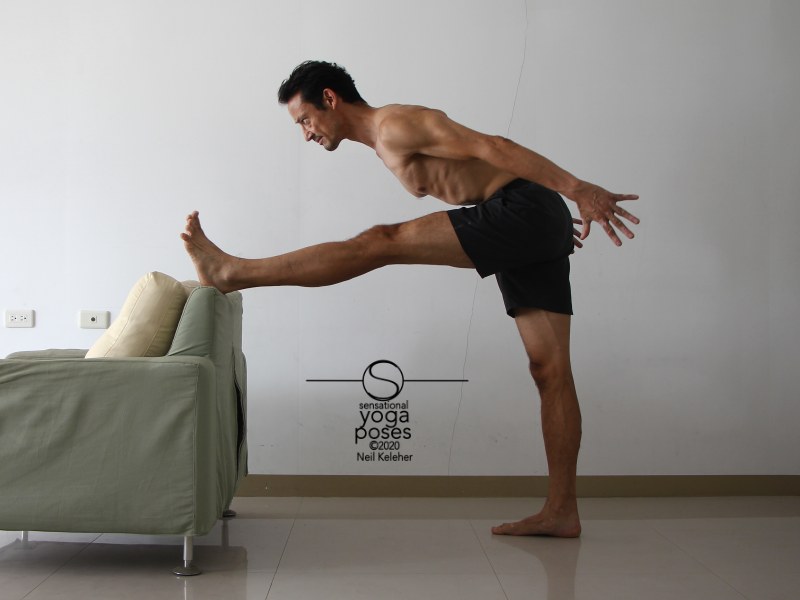
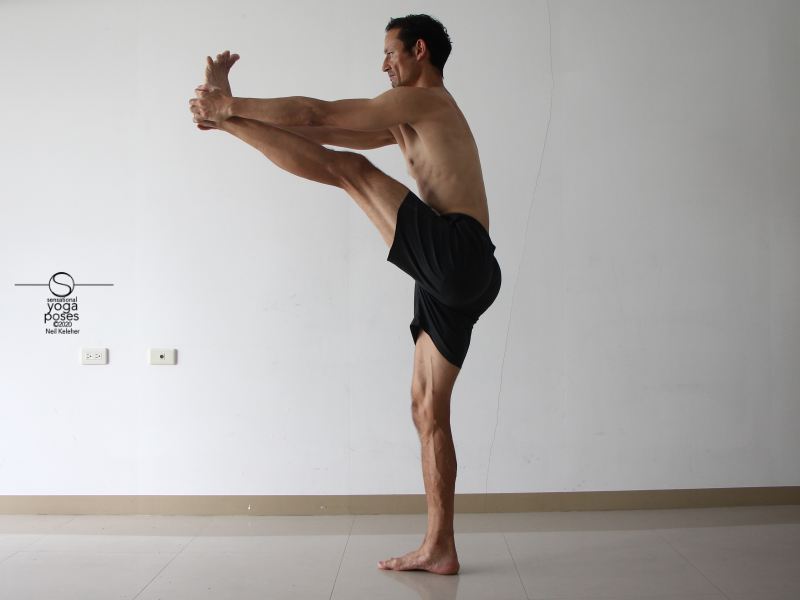
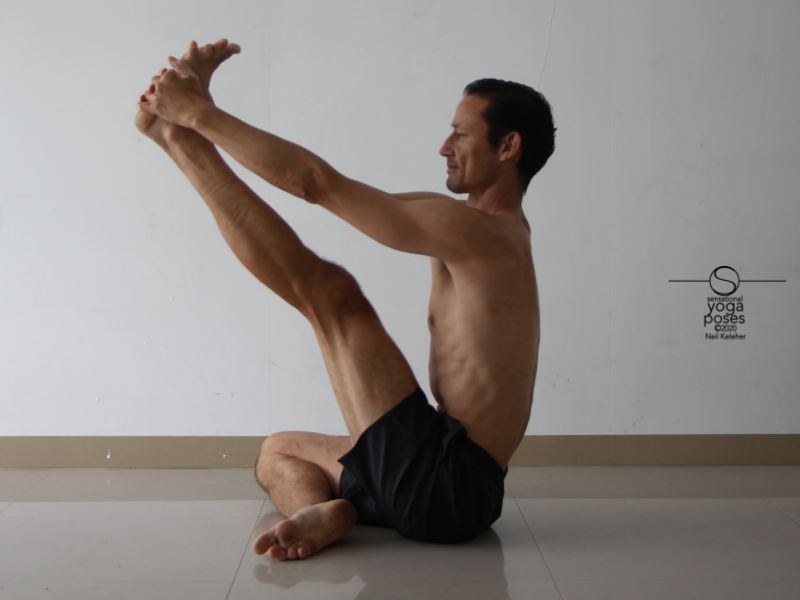
For this pose you'll need a belt. And actually, even if you haven't got a problem grabbing the foot with the knee straight, use a belt anyway.
In a lot of hamstring stretching yoga poses you grab a big toe or the foot of the leg being stretched. In so doing you can use the arm to resist the muscles of the leg being stretched. When grabbing the foot, because muscles can be used against each other, the feel of the pose is different. And it relies on you being able to grab the foot.
In this page I'll focus mainly on non foot grabbing options for hamstring stretching yoga poses. (Though I will mention how you can practice muscle control when grabbing the foot towards the end.) I'll make one exception to this rule, simply because it offers a simple way to get a feel for the hip joint. That exception is compass prep pose.
Sitting up tall, with spine long and belly pulled in using your transverse abdominis, keep your spine long as you lift and straighten the foot. Note that it's fine to lean back to counter the weight of your leg in front of your hips.
Push your foot against your belt (or strap or towel or whatever you are using). Pull back with the arms at the same time. Work at making your leg feel long.
To get a feel for your leg, and in particular your hip, push against the strap slowly and smoothly, and then relax slowly and smoothly while keeping the leg lifted (and knee straight). As you push, see if you can feel your hip joint. I'd describe the feeling as "creating space in the hip joint." It's as if you are pushing your knee joint, or your thigh, away from your hip bone. And actually, that's what you are trying to do.
Once you get a feel for the action, try to modulate it.
The idea is to create some space towards the back of the hip joint. However, if you push to hard then you risk over using muscles and/or bumping into (or at the very least causing a space restriction) at the front of the hip joint. So create just enough space that you can feel it.
A good sign that you have pushed too hard is that your muscles will be overly sore the next day.
The trick then is trying to recreate this same sensation in the poses that follow. And if you like, you can shorten the distance between your hands and foot, but as you do so, keep the feeling of space in the hip joint as well as length in your spine.
Note that in the poses that follow I may give alternatives for activating different muscles. Try creating space in the hip joint as suggested here. But in addition, try the alternate suggestions made with each pose.
On any given day, use the one that feels most appropriate.
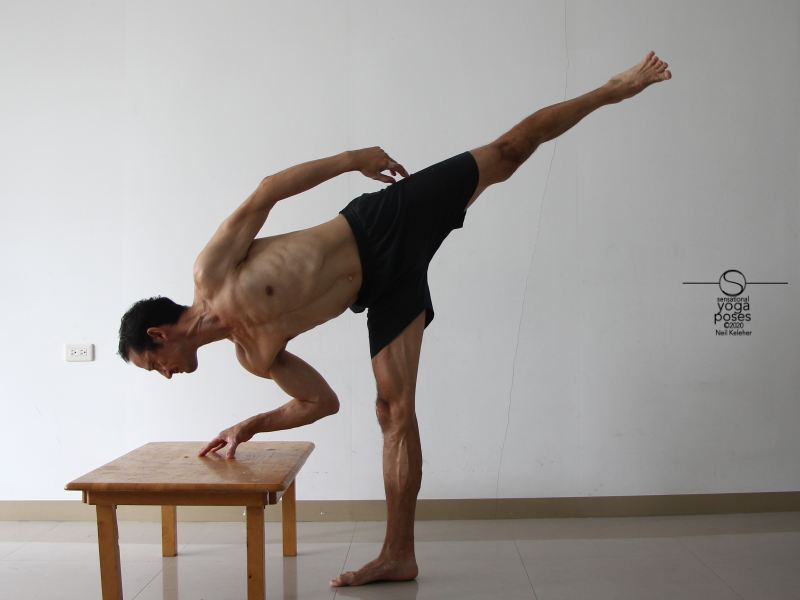
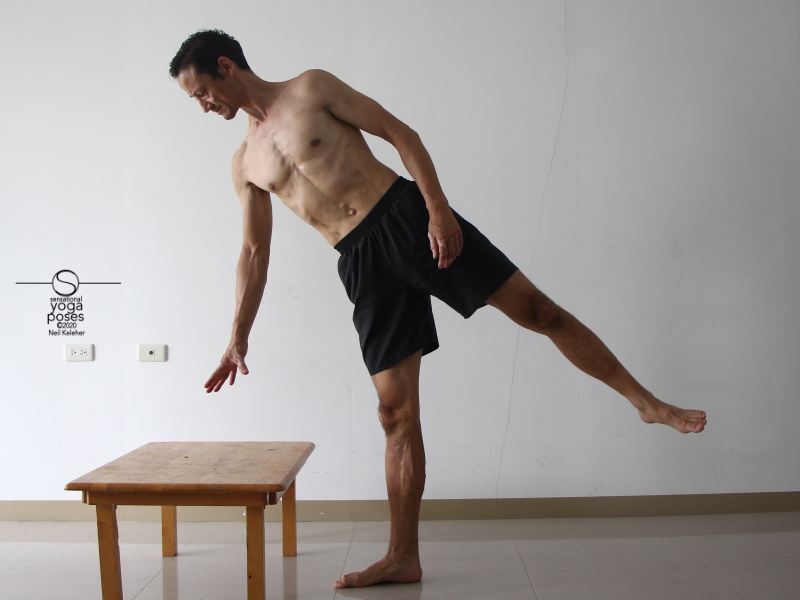
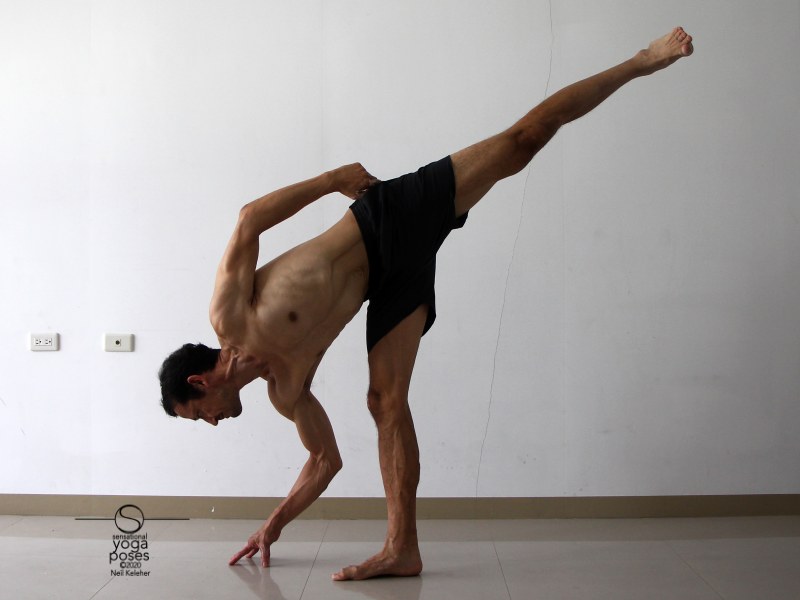
Half moon is a balance pose where you work at balancing on one foot.
One of the reasons I'm suggesting using it as a hamstring stretching pose is because it is a balance yoga pose your foot will be active (or can be made active to make balance easier!)
With the foot active the hamstrings of your supported leg will have an anchored end point which ideally helps to make it easier to control that hamstrings.
Here, the closer you get your torso towards your standing leg, the greater the stretch to your hamstring. Also, because the other leg is reaching back and balancing the weight of your torso, the supporting leg can be fairly vertical, more so than in, say, standing forward bend.
That being said, with the foot turned out relative to the hip, that can make bending at the hip a little more difficult.
As mentioned in the "compass pose prep using a belt" description, one simple action you can do here is try to create space in your hip joint. Because the foot is on the floor and bearing weight it may be a little bit harder. However, that weight here is more or less like the force provided by your arms in the compass pose variation. It provides a force for your hip muscles to work against.
Think of creating space at the bottom of your hip joint by slightly lifting your hip bone up off of your thigh bone.
Note, if you are flexible enough to touch your hand to the floor, you can do it without a table. (And if you have yoga blocks, feel free to use those instead of a table.)
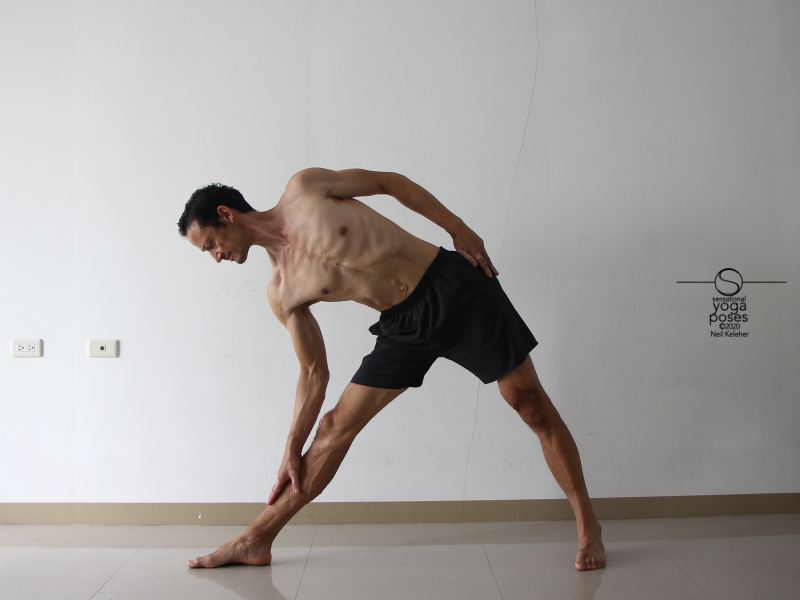
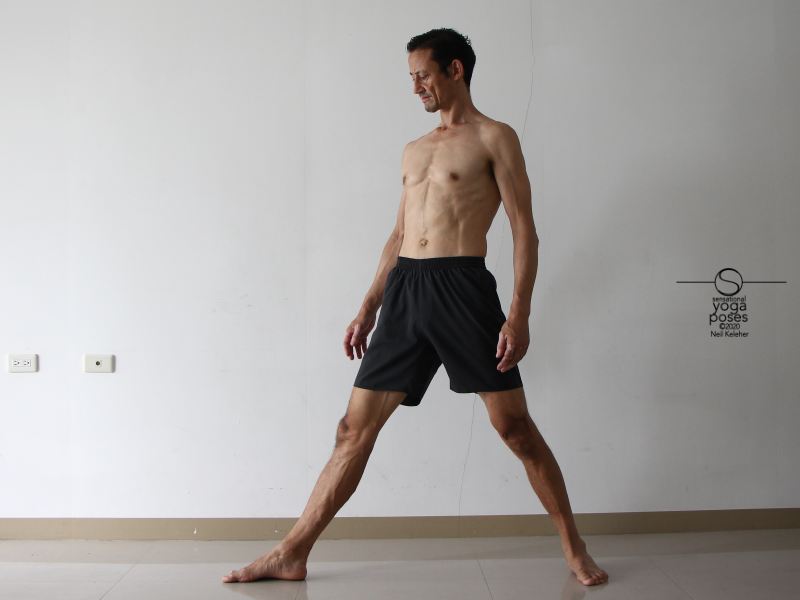
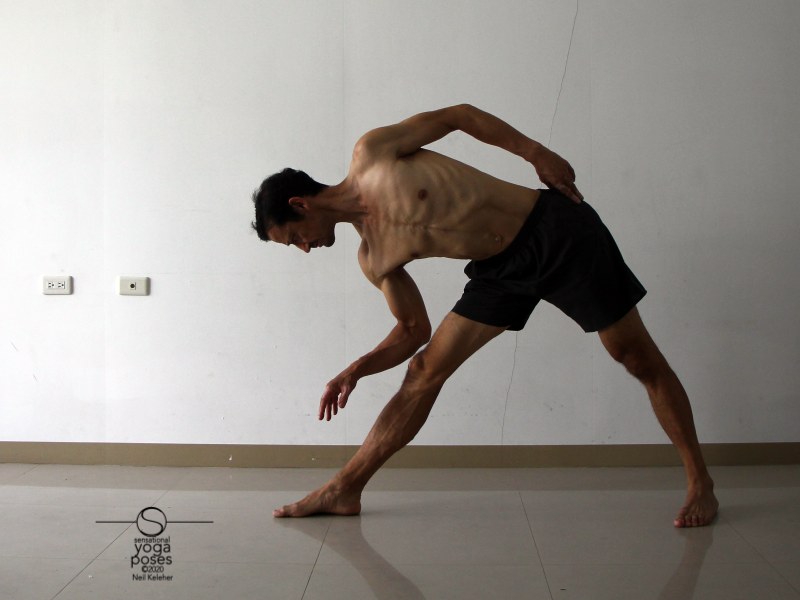
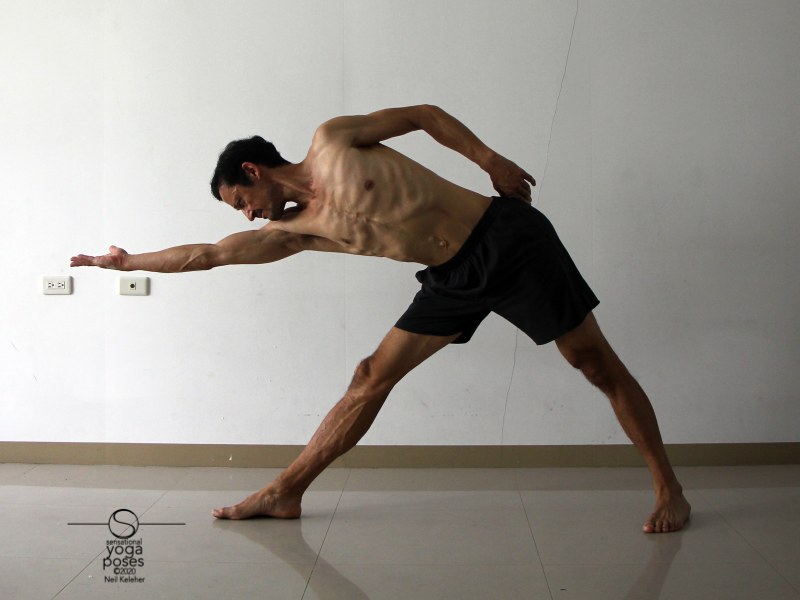
Like in half moon pose, in triangle pose the leg you are mainly stretching is turned out relative to the pelvis. As with half moon pose you can think of tilting your upper body towards the leg you are stretching.
Prior to bending towards your "front leg" you can lean away from it and make the leg feel long and the hip joint open. Also make your spine feel long. Try to maintain these sensations as you tilt your pelvis and upper body towards your front leg.
You can rest with your hand on your leg and relax your leg.
From there, make your leg and spine feel long, then lift your bottom hand. You can pause here and get used to holding this position (relax and repeat a few times).
If you are comfortable with your hand lifted, you can add more weight to the pose by reaching the arm to the side.
To add more weight for your hamstrings to work against reach the top arm also.
Work at gradually maximizing the feeling of length in the front leg, spine and arms (and then also in the back leg). Put your hand on your shin to relax.
When resting your hand on your shin, you can try bending the elbow with legs relaxed, (but with knees still straight)) to see if you can sink deeper so that you stretch the hamstrings of the front leg.
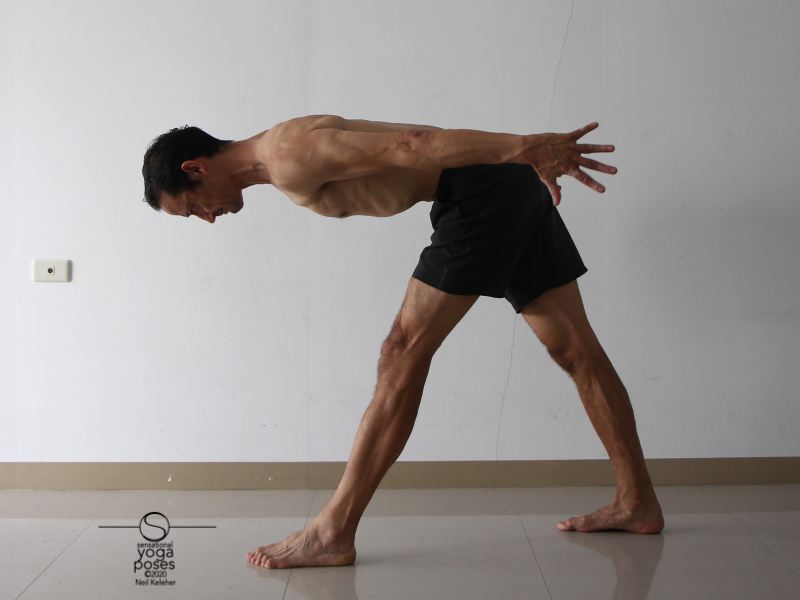
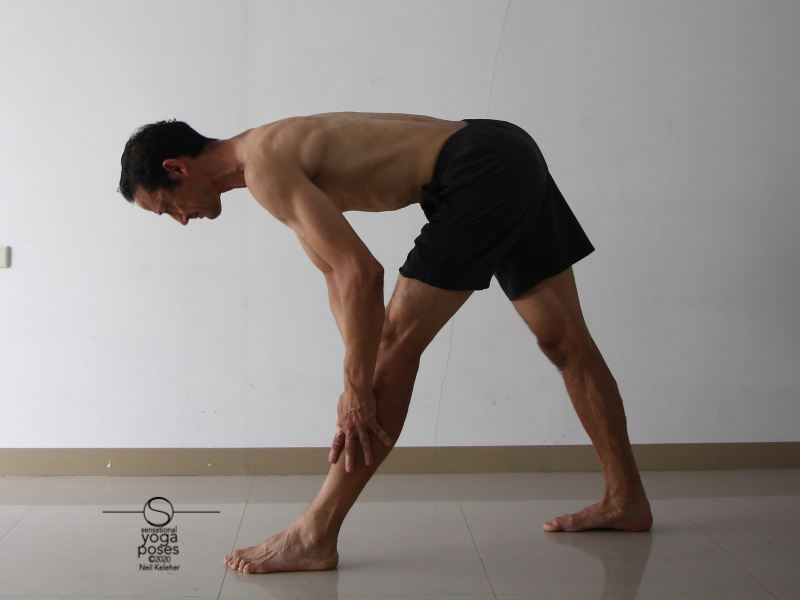
This hamstring stretching yoga pose is called Pyramid pose or Parsvottanasana. It's similar to triangle pose however in this yoga pose your torso faces in the same direction as the front foot.
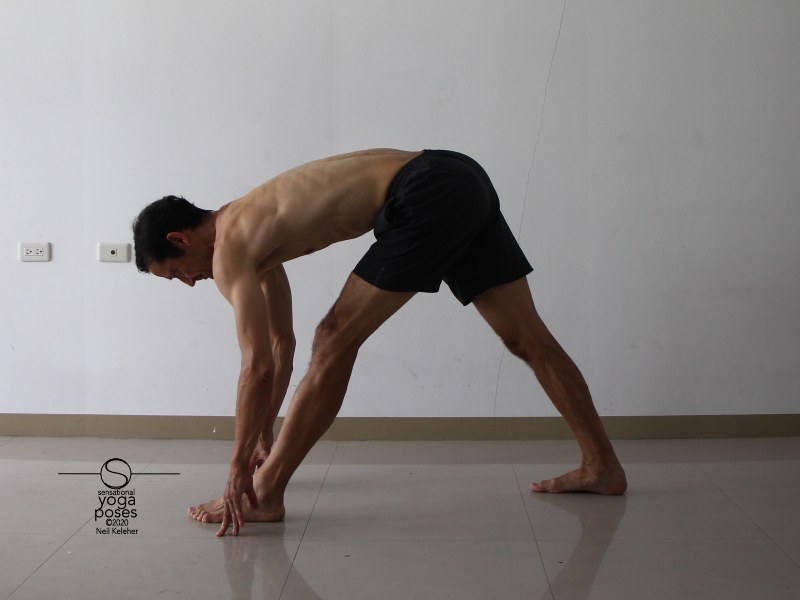
With arms lifted as in the first picture, the hamstrings or one or both legs have to activate to support the weight of the upper body.
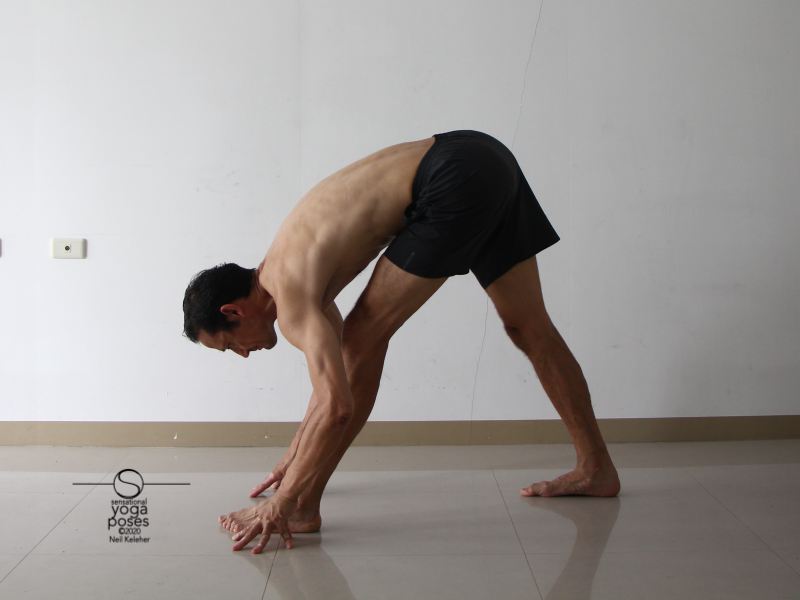
To tilt the pelvis forwards so that the torso moves closer to the front leg then the hamstrings have to lengthen. If this is done without using the arms to support the weight of the upper body, then the hamstrings have to stay active as they lengthen.
(This is known as an eccentric activation. But you can think of it as the hamstrings "lengthening while activated".)
With lack of experience, your hamstrings may lock and prevent you from deepening the forward bend. They won't be able to lengthen while active. You could think of this as a fear response.
And so one goal of hamstring stretching is negating the fear response.
One way to overcome the fear response when stretching the hamstrings while doing standing or seated yoga poses is to use the arms to help support the body.
In the first picture above I'm resting my hands on my legs. If I press my hands down against my leg then my arms support my upper body meaning that my hamstrings can ideally relax.
If I can keep my hamstrings relaxed I can gradually tilt my pelvis forwards. So that my ribcage can lower as I tilt my pelvis forwards, I can either bend my elbows as I tilt my pelvis forwards or slide my hands down my leg towards the floor.
Another option for overcoming the fear response is to practice activating and relaxing the hamstrings.
To practice activating and then relaxing your hamstrings, you can try the following:
Start with the hands on the leg. Keep your torso still and slowly relax your hands and lift them. Note the muscular tension in your legs. See if you can feel your hamstrings and even your posterior glutes activating. If not, then reach your hands forwards making your spine feel long. See if now you can feel the muscles at the back of your legs activating. Then put your hands down and relax your legs. Repeat a few times and then switch sides.
If you practice a few times you'll learn to feel what you need to do to make your legs strong in just the right way to support the weight of your body.
With the legs strong, your spine then has a stable base (the pelvis) from which to lengthen. Your then have a firm foundation for lifting the arms.
Each time you lift the arms you practice engaging the hamstrings. You then give yourself, and your hamstrings, the confidence and experience so that you can begin deepening your hamstring stretch.
Note, the amount of hand lift required is minimal.
When do you stretch the hamstrings in the above hand-lifting exercise?
One option is when you put your arms back down on your leg or the floor.
With your hands on your leg (or on the floor) you can gradually bend your elbows as your hamstrings relax.
As your elbows bend your ribcage can move closer to your leg.
However, rather than bending the spine so that this happens, tilt your pelvis forwards so that your ribcage and pelvis tilt forwards as one unit.
You'll then be stretching your hamstrings. Work at keeping them relaxed as you do so, and when you feel them tense up, stop there. Try activating your hamstrings again and lifting your hands, then put your hands down and see if you can stretch your hamstrings a little further. You can repeat this process a few times.
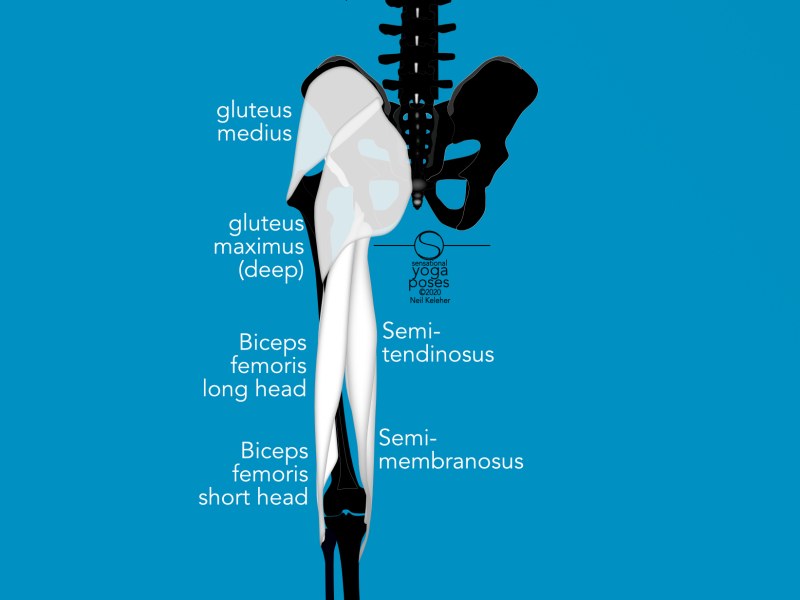
If you find that your lower back is really stiff when doing standing yoga hamstrings stretches, you might find that activating your gluteus maximus muscle is really helpful.
Another way to work around the fear response while doing hamstring stretches is to focus on moving your hip bones.
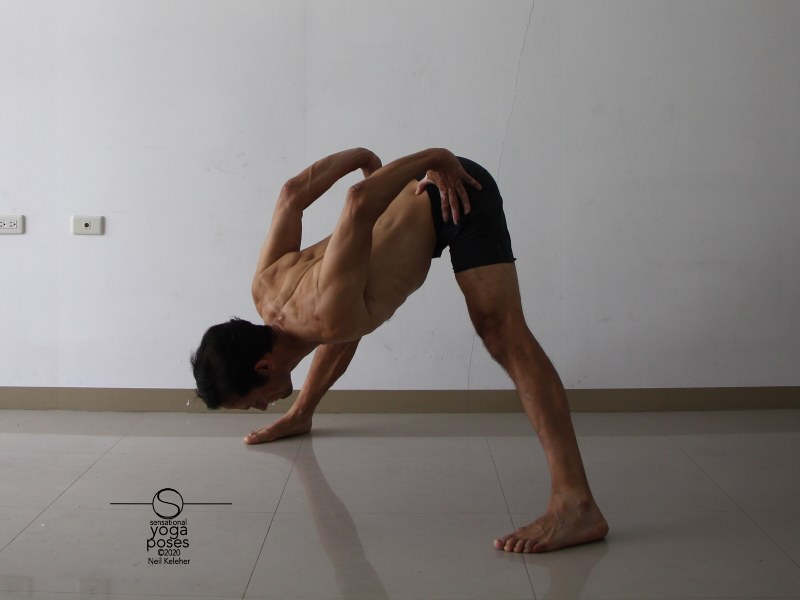
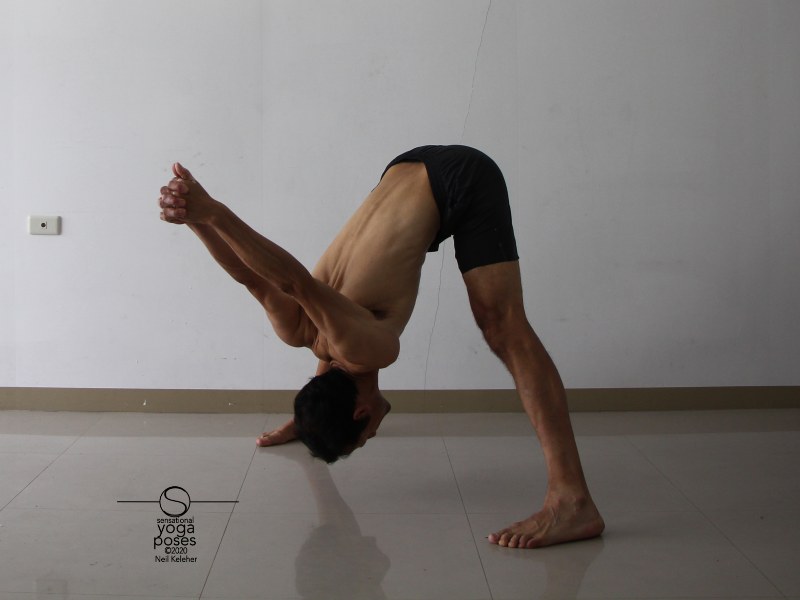
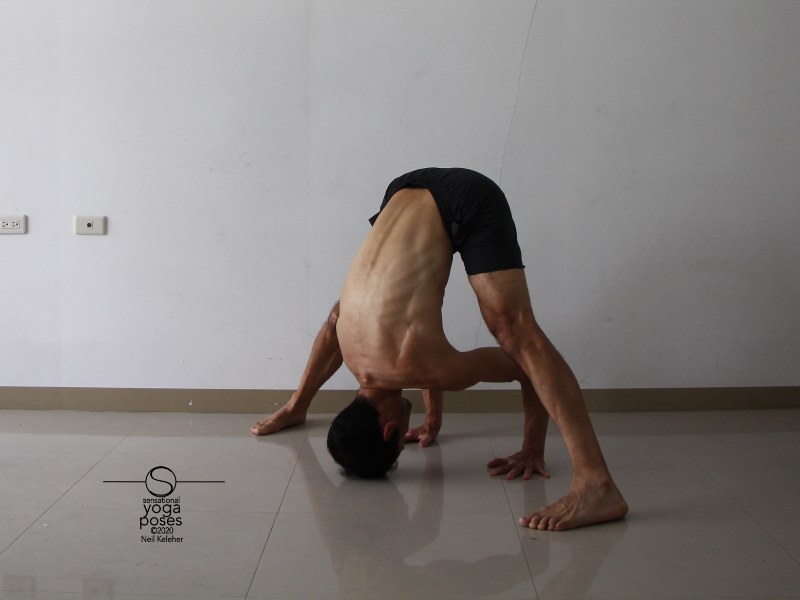
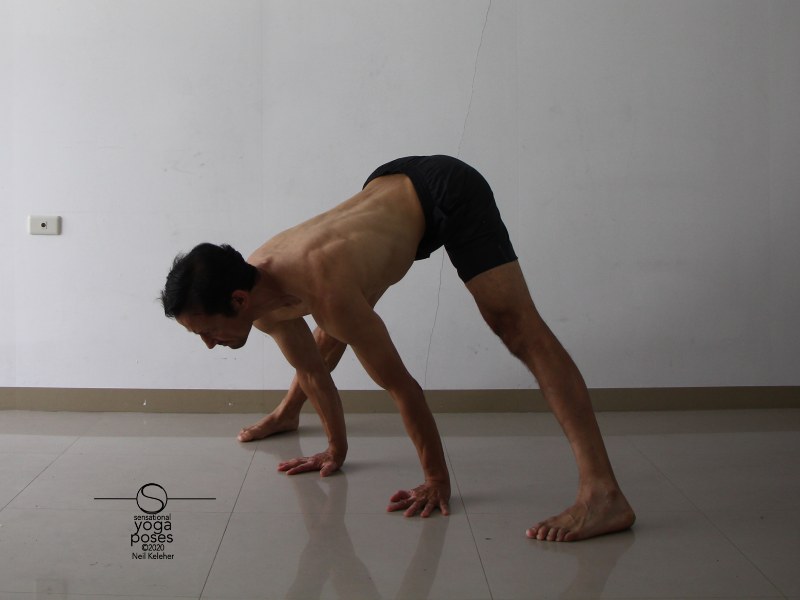
In the case of the standing wide leg hamstring stretch (prasaritta padottanasana) you can focus on lengthening your hamstrings by moving your sitting bones upwards, away from the backs of your knees.
The sitting bones are the bones that you can feel when you sit on a hard chair.
Lifting the sitting bones is simply a focused method for tilting your pelvis forwards.
An alternative action is to focus on pulling the ASICs down.
You can try these actions with your hands lightly touching the floor or with your hands off of the floor.
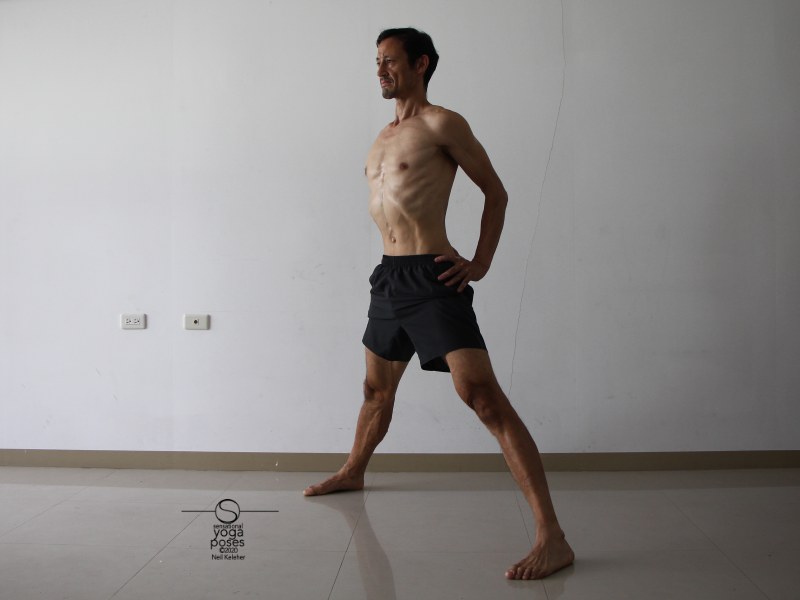
For example, you can place your hands on your waist as in pose called prasaritta padotanasana B. In this variation, once you've got a feel for either lifting your sitting bones or pulling down on your ASICs, you can also focus on lifting your chest and with your thumbs against the back of your waist, squeezing your shoulders blades together.
See if you can maintain this upper body posture when tilting forwards at the hips.
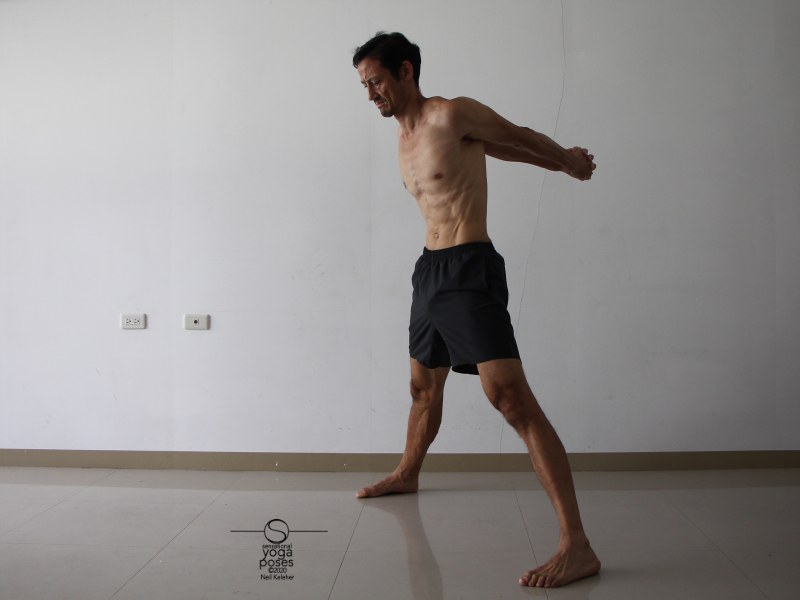
Another option is to clasp the hands behind the back. Here I'd suggest pulling down on your chest so that you can lift your arms higher. Keep this action as you bend forwards.
Again work at controlling your hip bones to stretch your hamstrings.
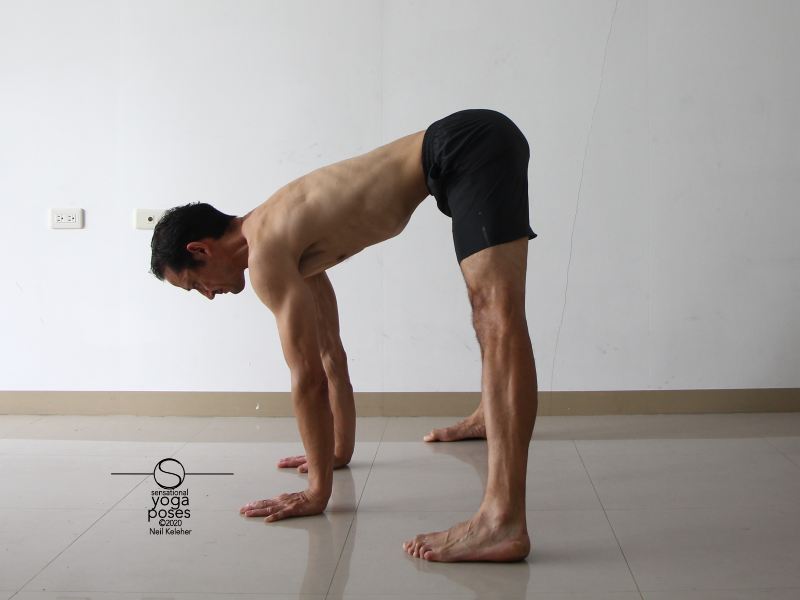
Bending forwards and placing your hands on the floor, you can use your hands to help assist your forward bend. Note in either of the cases that follow, you'll be using your hamstrings against the strength of your arms. Because your hamstrings will be active as you work at stretching them, you could think of these as "active hamstring stretching yoga poses".
In the first version of this active hamstring stretch, place your hands on the floor and if possible, bend your elbows. Prevent your hips from moving back, push your hands forwards against the floor so that your arms feel strong and your hamstrings (and glutes) feel strong also. Slowly increase the pressure and then slowly decrease it to relax.
Repeat a few times and rather than forcing your chest towards your legs, work at "feeling your way" deeper into the pose.
Work at keeping your spine long while doing this.
Another option is to also make your legs feel long.
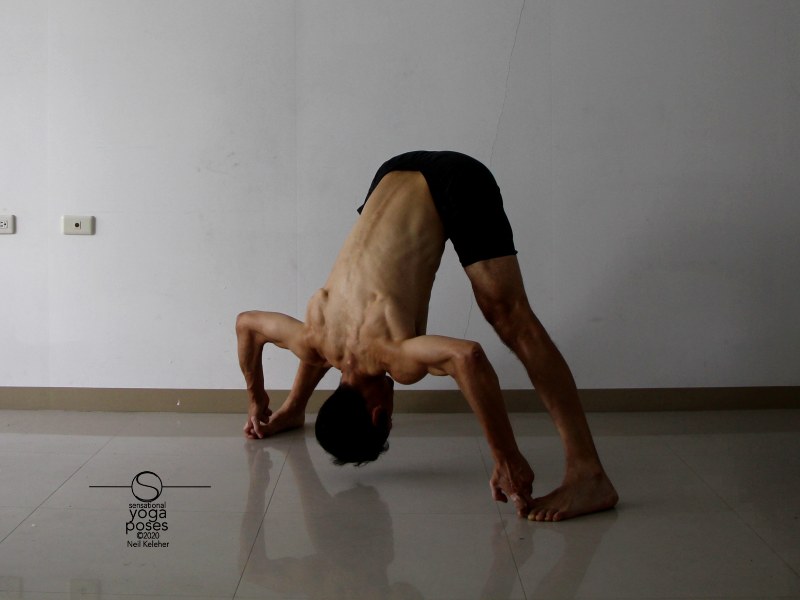
In the next version of this active hamstring stretch, grab your big toes (use the first two fingers of each hand) and bend your elbows. Make your big toes strong (press them downwards) to resist the upwards pull of your arms. Make your spine (and legs) feel long, and rather than pulling towards your thighs, work at pulling your body towards the floor.
(You can also try pulling your chest towards your legs.)
As with the previous version of this exercise, rather than trying to your chest towards your legs, work at "feeling your way" deeper into the pose.
Another way to support the body while doing a standing hamstring stretch is to use the butt muscles.
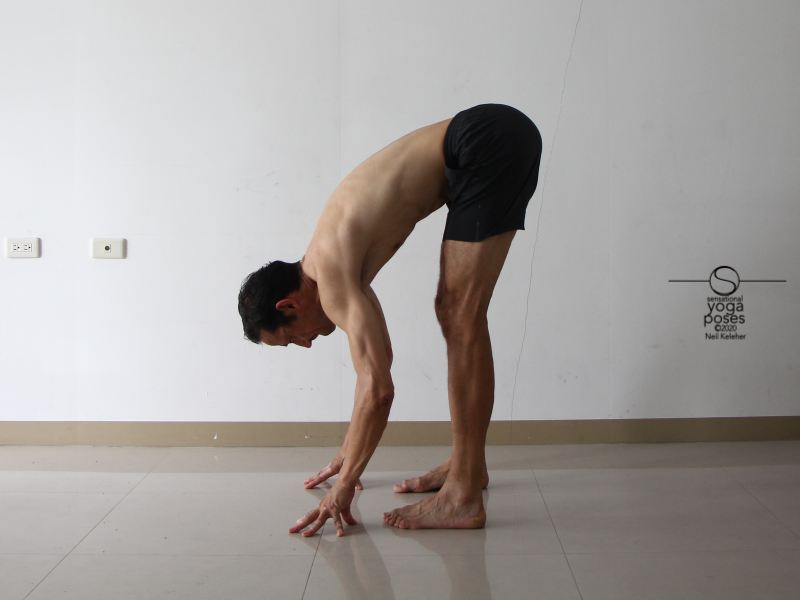
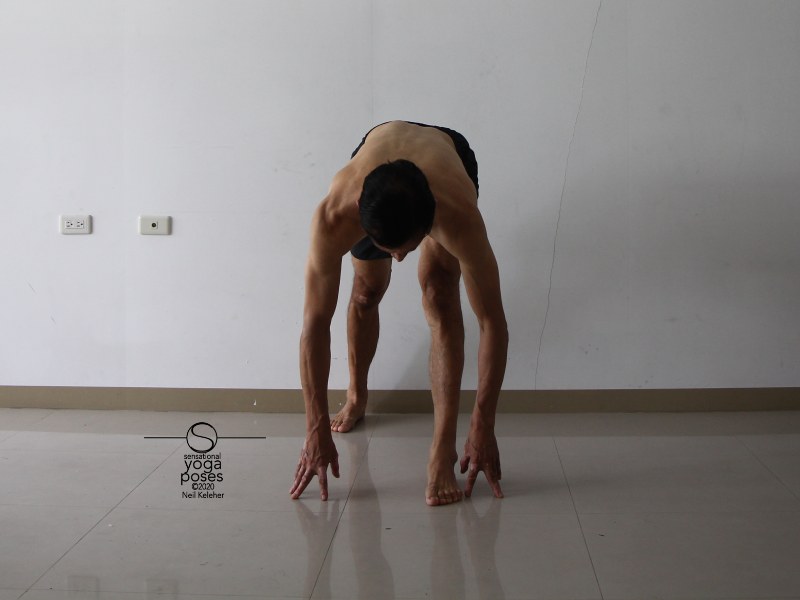
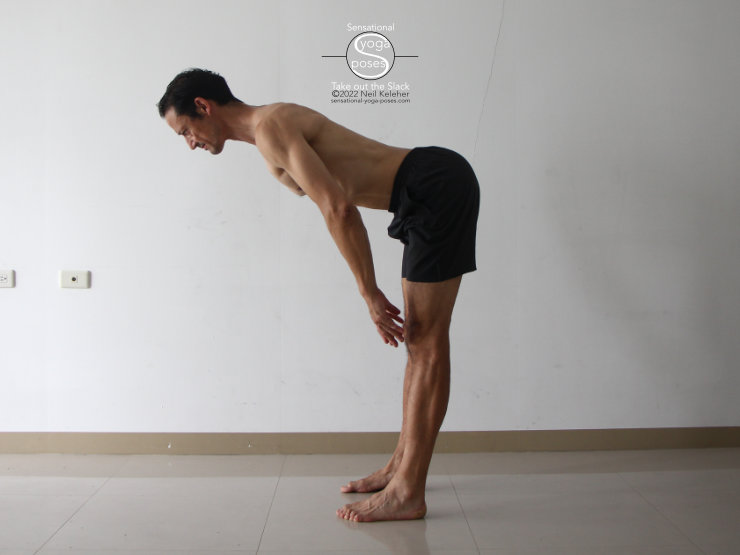
For standing forward bend, stand with feet parallel and hip width (or shoulder width) apart. Note that so it feels more comfortable, play with turning your feet outwards varying amounts. Slowly bend forwards while keeping your butt engaged.
With hands on your shins or on the floor, you can relax your posterior glutes. Then try activating them prior to lifting your hands.
Each time you relax your butt cheeks see if you can also relax your hamstrings so that you can stretch them.
In seated hamstring stretching yoga poses you may find that pressing down through your heel (or heels) helps improve hamstring flexibility.
Do it in such a way that your legs feel strong.
If your hamstrings are so tight that you can't sit upright with the legs straight then this action may not work. An option is to focus on standing hamstring stretching yoga poses until you have enough hamstring flexibility to sit upright.
Another option is to practice this action with your back against a wall. Work at pressing down through your without allowing your hips to lift.
As you get the feel for this action,s see if you can do it away from the wall (even if you can't sit upright!).
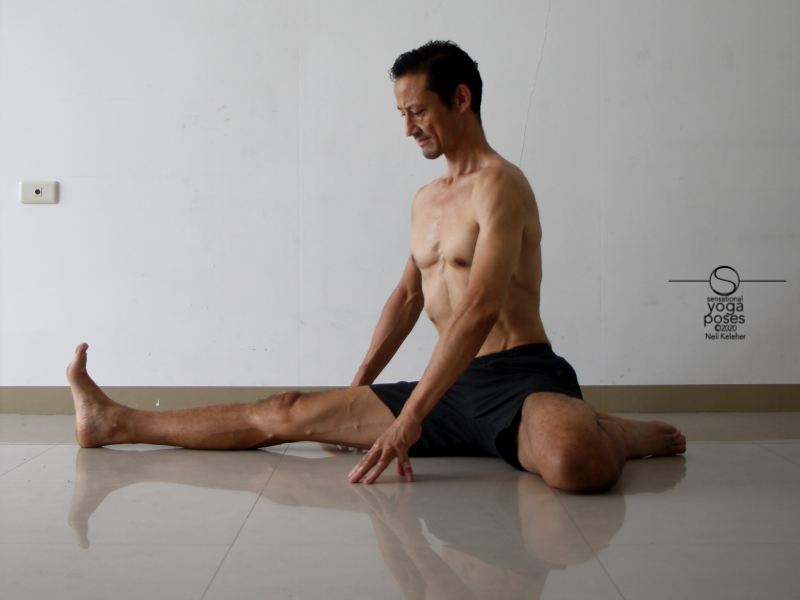
Generally, the seated wide leg seated forward bend is the easiest of seated yoga hamstrings stretches.
Try pressing your heels down to activate your hamstrings so that you can lift your hands (and if you choose reach them forwards). Then put your hands back down on the ground and relax your hamstrings. When reaching forwards, work at making your arms and spine feel long. Reach forwards with your eyes.
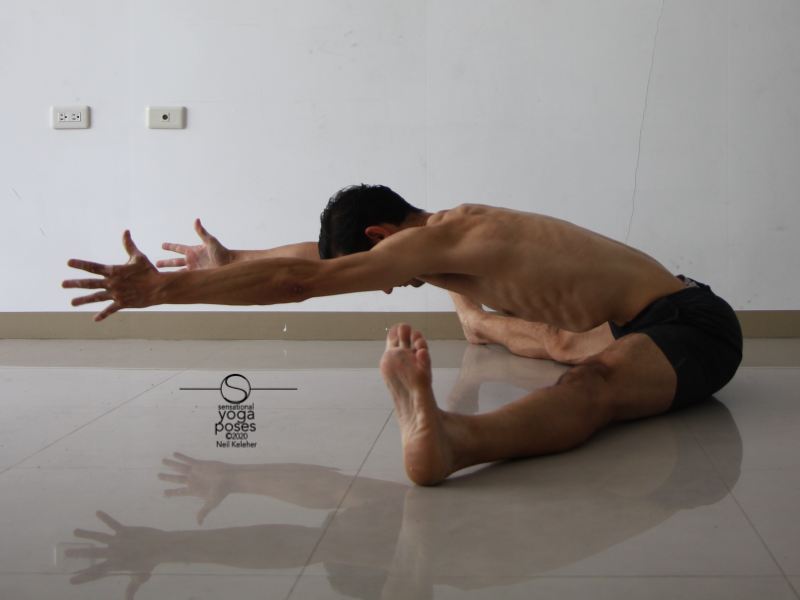
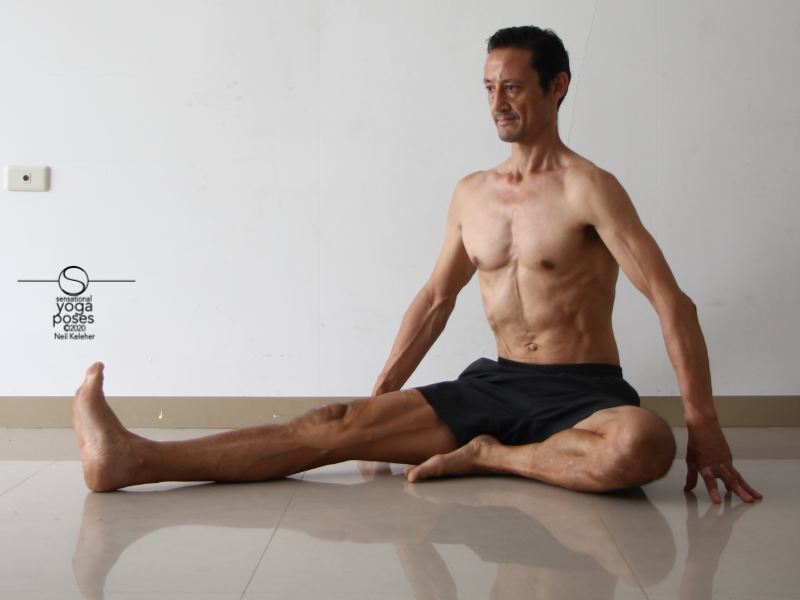
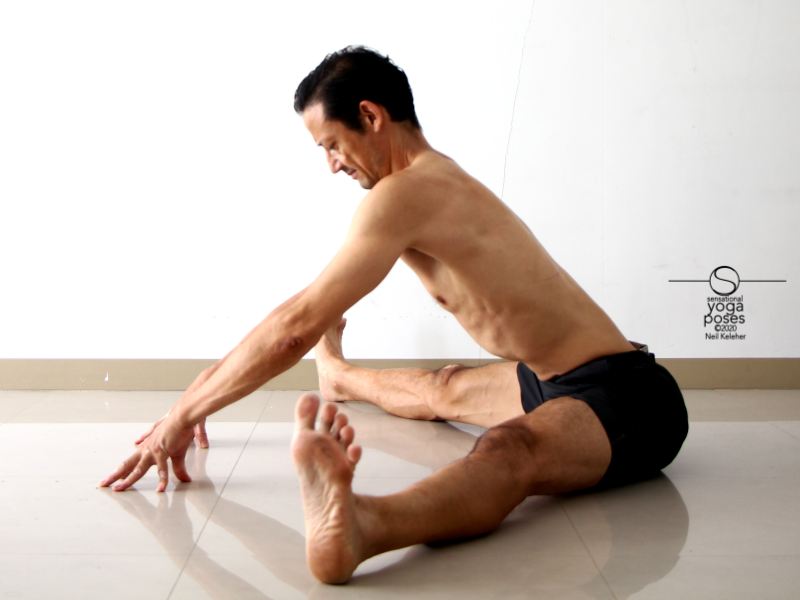
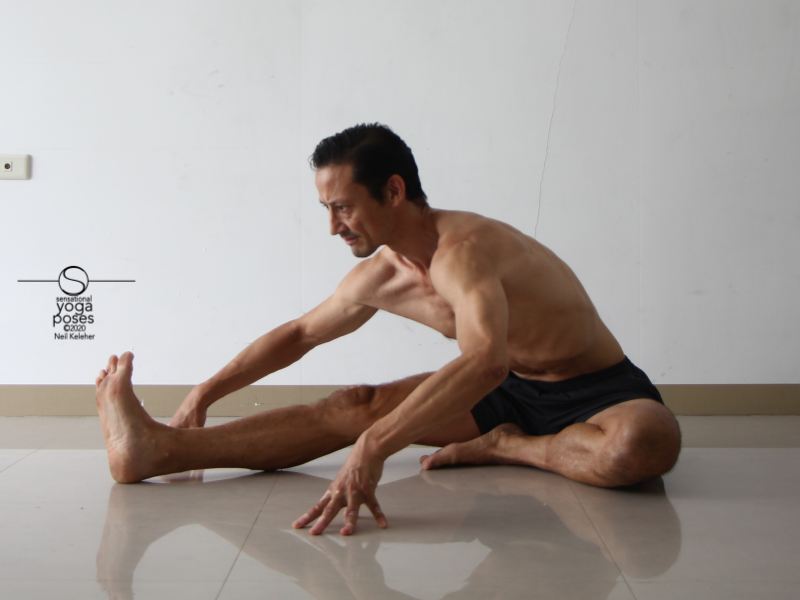
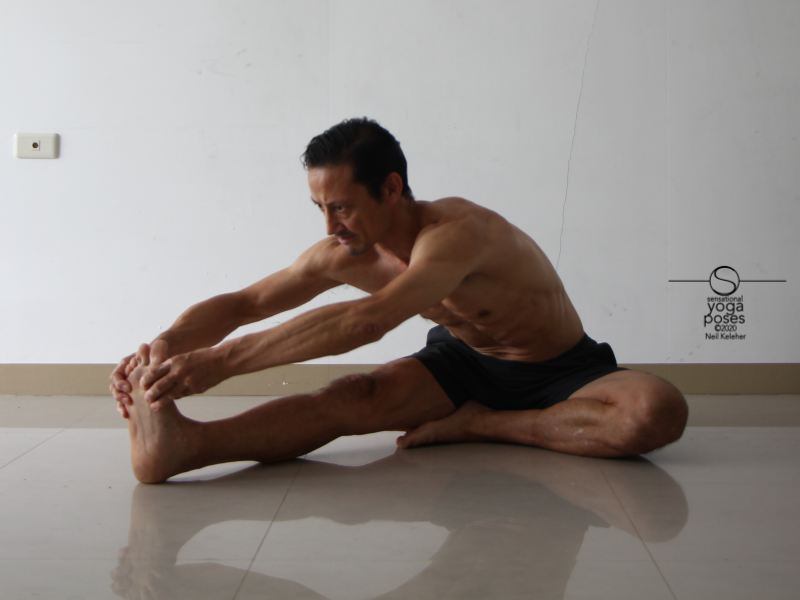
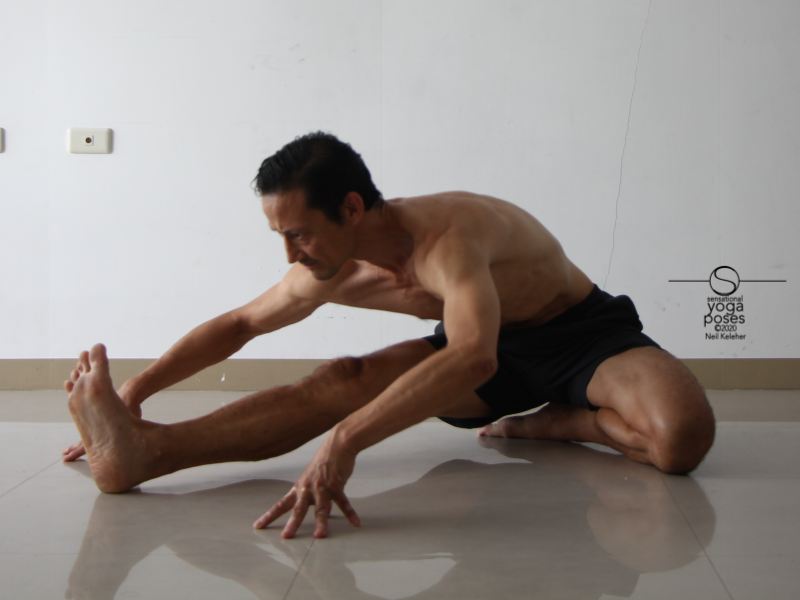
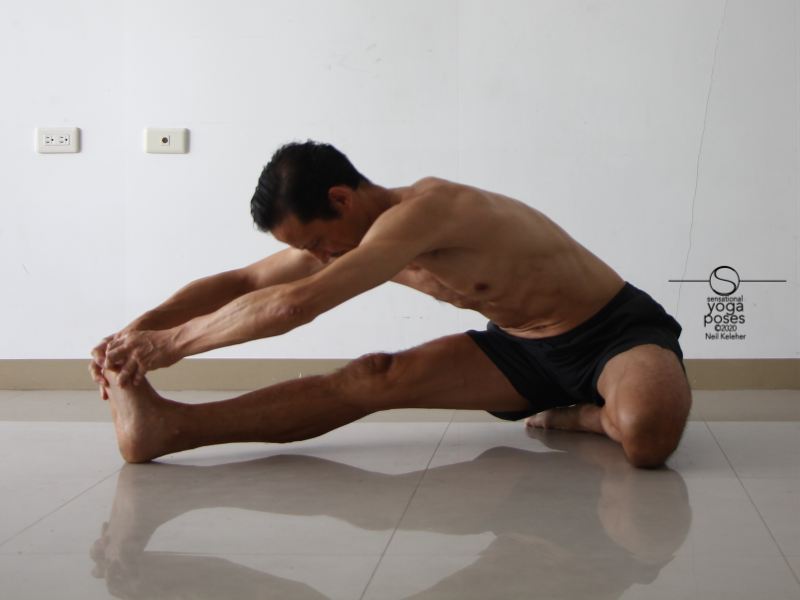
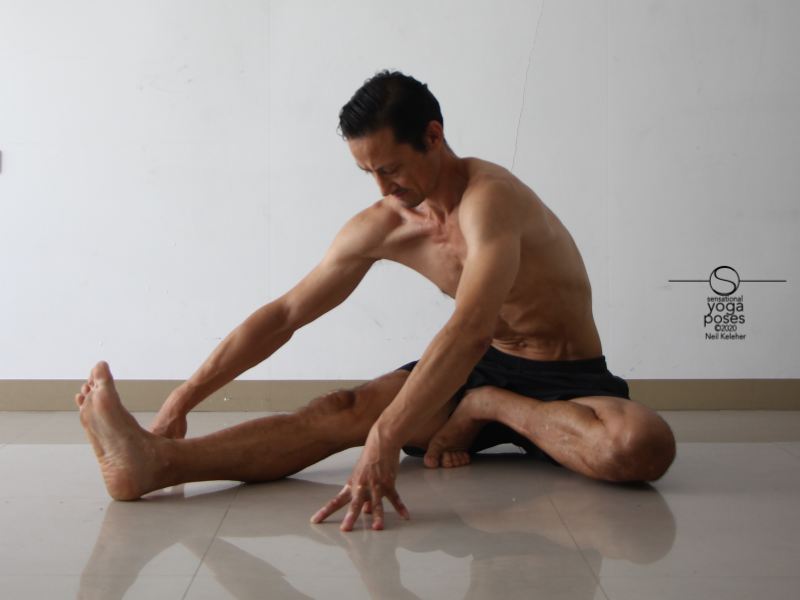
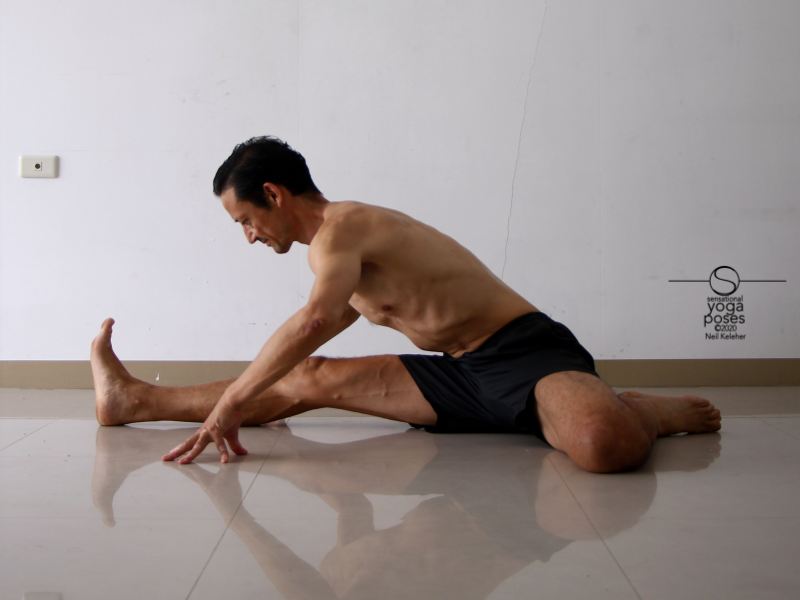
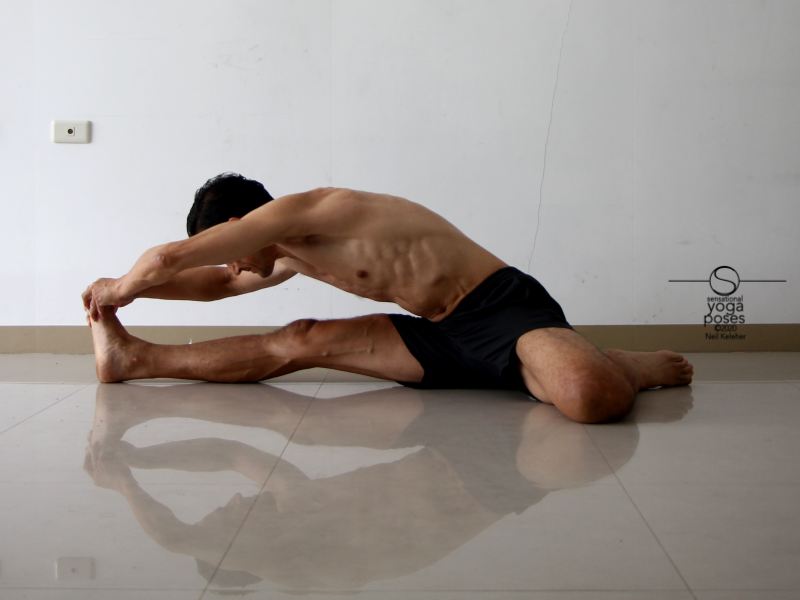
In Janu Sirsasana A you stretch one set of hamstrings at a time.
You can do this pose with the bent knee foot pointing towards the straight leg foot. Or you can arrange the bent knee foot so that it points directly at the straight leg thigh.
To protect your knee, and also to get used to using muscles that rotate the shin relative to the femur and hip, if pointing the foot forwards, you may find it helpful to use your ankle muscles to create a slight lift of the forefoot. (You could also try lifting the heel instead.) If pointing the foot towards the opposite thigh, try reaching the bottom of the heel forwards (you could reach the forefoot rearwards.).
In either case the idea is to actively position the foot of the bent knee leg.
Bending forwards you can first bend forwards while facing between both legs.
If you start of with this variation, shown below, you can increase the difficulty of the pose by gradually shifting your body relative to your legs (use your hands to help walk your torso towards your straight leg) so that your torso ends up reaching over your straight leg.
If your bent knee doesn't touch the floor in this pose, try placing a yoga block beneath it to support it. Or allow your straight leg hip to lift so that your bent knee hip can rest on the floor. (You can use the bent-knee arm to support yourself.)
Here too you can play with foot control, perhaps lifting the heel or forefoot to see if either option makes it easier for your knee to sink down. Or, simply repeatedly move between both actions slowly and smoothly, so long as neither action causes knee pain.
Note that while bending forwards, you can support your body using your arms. To lift your arms, press your leg down. If you grab the foot, you can pretend to work but instead just use your foot to support your arms (which is the same as placing your hands on the floor to support the weight of your body).
Another option is to grab the foot and use the arms to create an upwards pull on the foot. Resist by pulling your leg down.
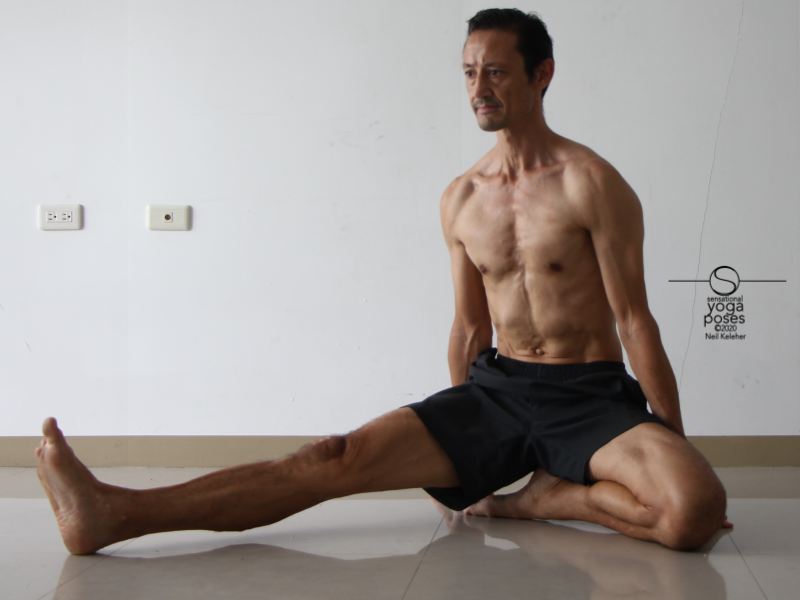
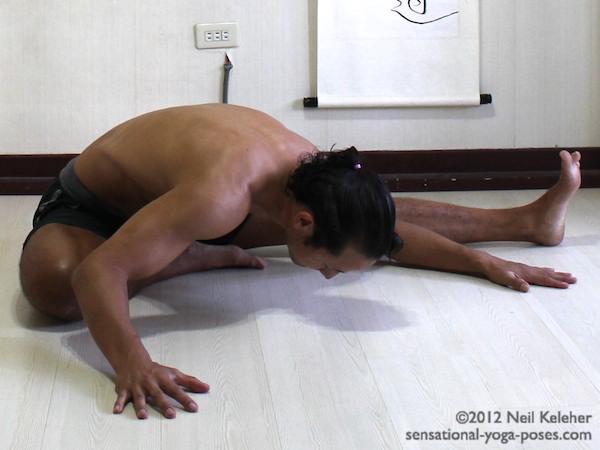
In Janu Sirsasana B position your pelvis so that your anus is on top of your heel. Then bend forwards.
As with janu sirsasana A, you can point the bent knee foot to the side or forwards. But in either case, work at making the foot active as described previously.
To keep your knee safe during this pose, make it active. One way of doing that is to actively "shape" the foot as mentioned.
As with janu sirsasana a, you can support the weight of your upper body using your arms. This can make it easier to relax the hamstrings of the straight leg so that you can stretch them. Alternatively, activate your hamstrings as you reach your arms forwards. Or activate them against the strength of your arms if you are grabbing your foot.
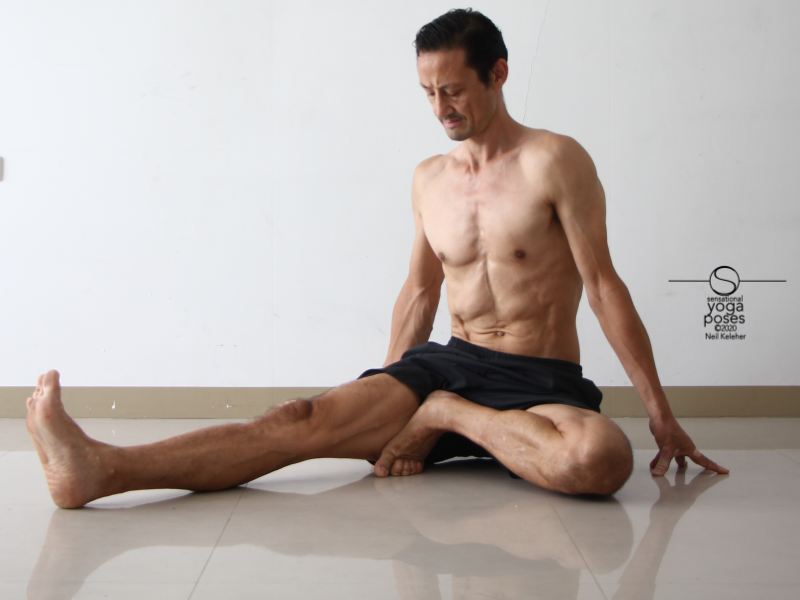
Here are some suggestions for getting comfortable in the Janu Sirsasana C foot position as well as some modifications.
Work at using those aforementioned shin control muscles to move your heel forwards and your forefoot back. But move slowly and smoothly and carefully.
You may find that bending forwards and stretching the hamstrings with both knees straight is easier if you first do some of the above hamstring stretching yoga poses where you bend forwards with only one knee straight.
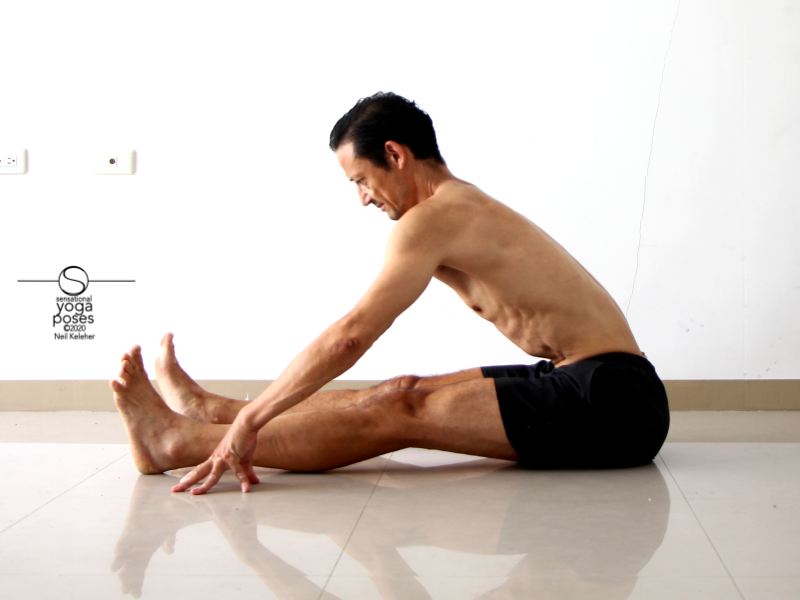
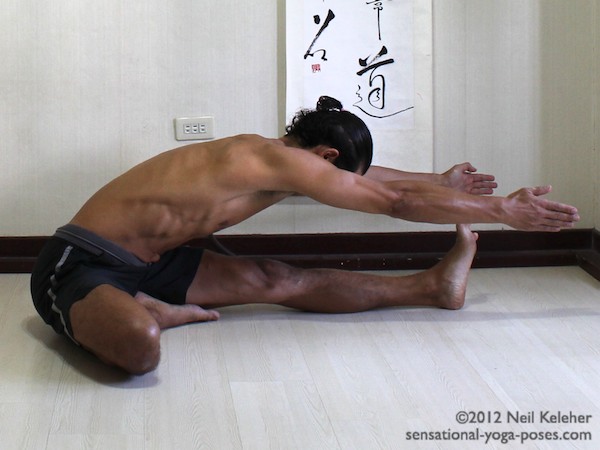
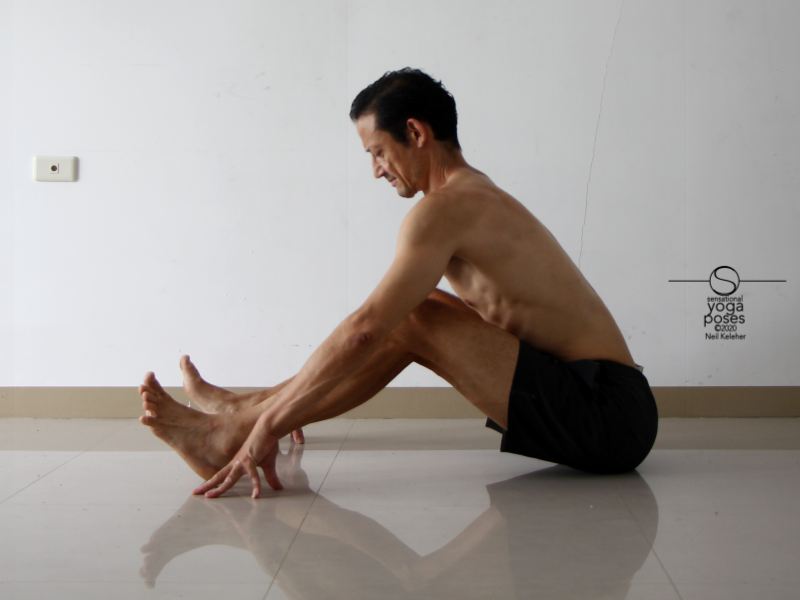
The seated yoga hamstring stretch with both knees straight (and feet together) is called paschimotanasana.
In most options the usual instructions involve grabbing the big toes or feet in some way. An alternative is to rest your hands on the floor. Make your legs feel long and create space in the hip joint (Just enough that you can feel it!) Then make your spine feel long. You can shoot your gaze forwards and from there lift your hands and reach your hands forwards.
Rather than just lifting your arms, reach them forwards and make them feel long. Reach forwards with your eyes, arms and spine. Slowly relax and then repeat, reaching slowly and smoothly and relaxing slowly and smoothly.
Note if that lifting the arms is too difficult then keep your hands on the floor. But still reach with your eyes making your spine and legs feel long as you do so.
As in some of the previous exercise descriptions, you can also play with pressing your heels down in this pose. Try focusing on one foot at a time.
As with the wide leg seated front fold, you can also do this seated forward bending yoga pose with knees bent.
An optional muscle activation when doing this yoga pose with knees bent or straight is to try to widen the top of your inner thighs (close to the groin) while keeping your feet (and knees) in the same position.
With inner thighs widened, press your inner thighs downwards (while keeping your knees pointing upwards) so that you can use your psoas and iliacus to help tilt your pelvis forwards. Or focus on using your outer glutes (gluteus minimus and medius) to help tilt your pelvis forwards relative to your thighs.
Another option is to use the hip flexors that attach at the ASICs (sartorius, tensor fascia latae, rectus femoris).
If you find that your back rounds excessively in this pose or you have difficulty lengthening your spine, the tips in seated forward bend may help.
Since seated hamstring stretches tend to stretch the hamstrings and open the back of the body, you can counter pose them by opening up the front of the body with back bending yoga poses. Make sure that you include back bending yoga poses that open up the front of the hips.
Published: 2020 07 24
Updated: 2023 03 27
