Side Angle Pose
Lengthening and Binding in
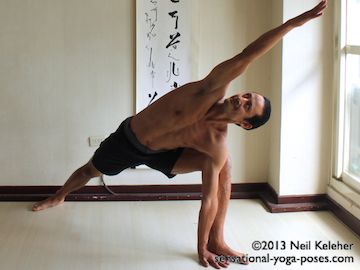
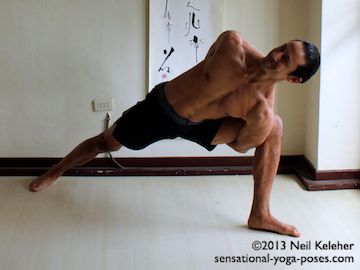
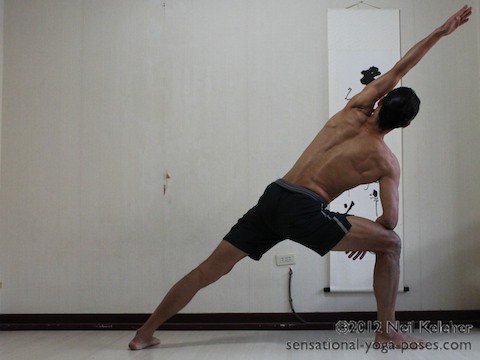
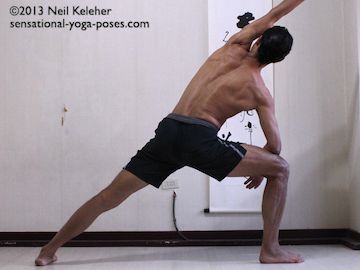
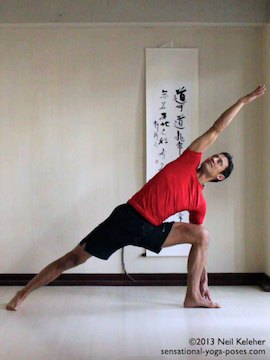
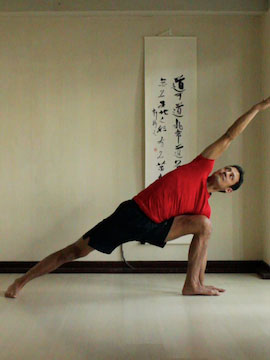
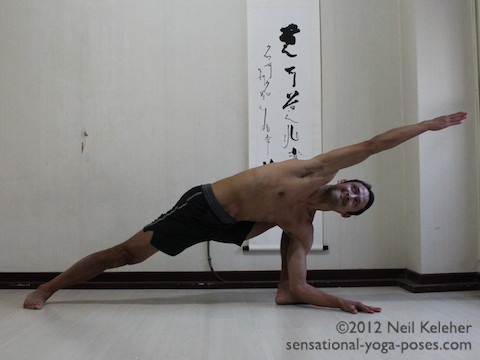
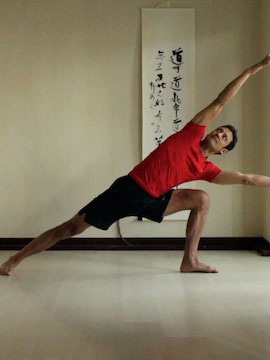
In side angle pose (utthitta parsvakonasana) the side of the body, straight leg and upper arm form one straight line reaching upwards at an angle towards the bent knee side. The shin of the bent knee leg is nearly vertical and you can work towards making the thigh of that leg horizontal so that the knee has a bend of 90 degrees.
You can rest an elbow on your thigh, but push down against your thigh to help lift your ribcage. Or place that hand on the floor either in front of the foot or behind it.
For stronger abs, reach both arms to the side in this standing yoga pose.
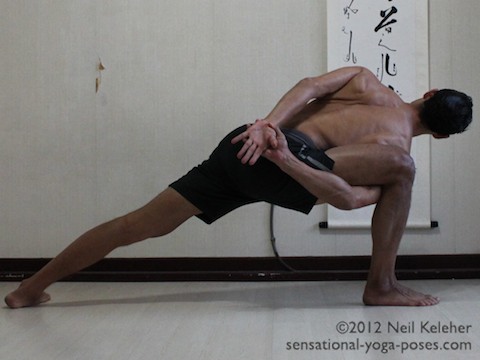
Binding is another option that can also increase ab strength as well as test your flexibility and strength.
Lengthening the Side of the Body
One of the ways to do side angle pose is to focus on lengthening the side of the body. You can learn to feel when your body is long by lengthening while inhaling and then relaxing while exhaling.
For maximum length first focus on your knee. Doing side angle to the right, bend the left knee slightly. Then straighten in and make your leg feel long. Then relax it again. When you straighten the knee work at making your entire leg feel long, as if doing a side kick with that foot.
Next you can focus on the left side of the waist. To lengthen here draw your left side ribs away from your pelvis. Then relax. At the same time you can work at creating space between your ribs on the left side so that the entire left side of your torso feels open.
You can focus on "opening the shoulder" by reaching the shoulder blade away from the pelvis. At the same time you can straighten your elbow and make your arm feel long. Make your fingers feel long also.
Synchronizing Actions with Breath
Practice these actions individually and then do them sequentially one after the other as you inhale. Relax then as you exhale. Once you've got the feel you can work on doing all of these actions at the same time.
Focus on slowly and smoothly lengthening and slowly and smoothly relaxing.
Why slow and smooth?
So that you can feel your body and improve your control. And also so that your movement is more like your breath, or how you might like your breath to be.
If you have trouble with breathing slowly and smoothly then focus on making your movements slow and smooth. You may find that your breath follows.
Pelvis Options in Side Angle Pose
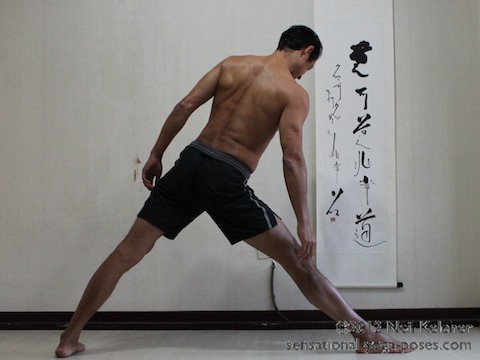
My own personal preference is to tilt the pelvis to the side in this yoga pose. After reading about the bikram yoga version of this pose I decided to try it with the pelvis level. It's a different feeling. I'd recommenn playing with both versions.
Usually I like to tilt the pelvis before bending the knee. Try to keep the tilt as you bend your knee. Then as you lengthen your side, vary the tilt and notice how changing the tilt feels.
If you choose to keep your pelvis level, focus on keeping it level as you reach your ribcage to the side.
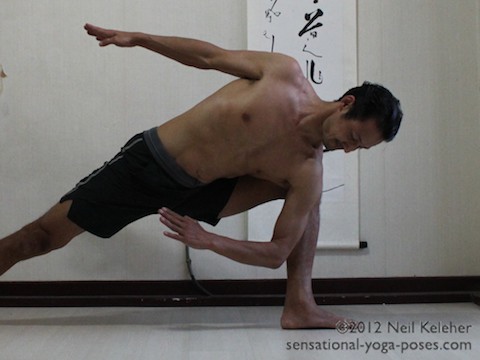
With the pelvis tilted to the side you keep the lumbar spine reasonably straight. You may end up stretching the hip extensor muscles. (First picture below.)
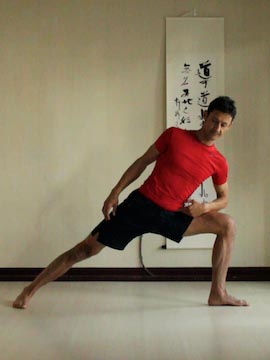
By keeping the pelvis level you bend the lumbar spine and possibly the thoracic spine. You then end up stretching the side of the waist and possibly the side of the ribcage. (Second picture)
Rolling the Ribcage and Spreading the Shoulder Blade
Another way to do side angle pose is to focus on rolling the pelvis and ribcage open. Doing side angle pose to the right, use your legs to roll the left side of your pelvis back. As you do so let the left side of your ribcage roll back also. Then relax. You can practice this prior to lengthening the side of the body. And then add lengthening on top of this action.
So that lengthening the arm is easier, after you roll the left side of your ribcage back, roll the left arm so that the bicep moves away from the back of the head. This action ideally helps to move the inner edge of the left shoulder blade away from your spinal column. This action helps to activate the serratus anterior muscle. As you roll the arm reach the shoulder blade away from the pelvis. This action uses the trapezius muscle.
Lengthening the Short Side
Another focus point is to focus on lengthening the short side of the torso. Doing side angle to the right you can focus on moving the right side of your pelvis away from your right ribs. (This is while doing the pose with the pelvis tilted to the side.) At the same time reach your right ribs away from the pelvis.
Gradually Going Deeper In Side Angle Pose
You can practice the above while doing side angle pose with your forearm on your thigh. Then once you've got the hang of lengthening the side of your body, then try the pose with your finger tips or palm on the floor.
Ideally the thigh is level in this yoga pose but you can work towards that. Do it the first time with feet closer together and then when repeating the pose step your feet wider apart until the thigh is level and the shin nearly vertical.
Sinking the Elbow down to the Floor
For a deeper stretch of the hip extensor muscles, you can position the hand inside the foot and bend the elbow. Try to touch your elbow to the floor inside the foot. Then work at rolling your ribcage open. At the same time lengthen the side of your body. This is an excellent prep or precursor to the low lunge hip extensor stretch.
This can actually be a good way to prepare for binding in side angle pose.
Binding In Side Angle Yoga Pose
To bind in side angle pose it helps if you can get your elbows below the bottom of your thigh. From there you can internally rotate the arm and reach it under the thigh. And then you can grab the wrist (or fingers) of the other hand. Once you've bound in this binding yoga pose you can focus on rolling the top side of the ribcage back. And you can roll the uppermost shoulder open also.
Exercising the Abs
To use side angle pose as an ab exercise, lift both arms and reach them to the side. Reach your ribs away from your pelvis and your arms away from your ribs. Make your neck long also.
To start with have your elbow on your thigh (or on the floor).
Make your legs strong. Then lift lenghten your waist. Then reach with the bottom arm. Then replace your bottom arm on your thigh and relax. Then repeat, inhaling to lengthen, exhaling while relaxing.
You can then work at holding the yoga pose with your arms reaching to the sides.
For an extra challenge come out of the pose slowly, with arms continuing to reach past the head. Straighten your knees when you get to the top and then reach your ribs, head and arms upwards.
Published: 2011 07 15
