Standing Yoga Poses, toc
Lateral standing poses | Longitudinal standing poses
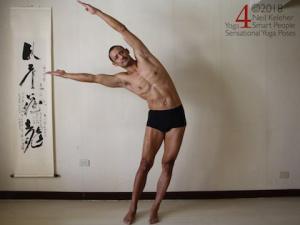
Standing side bend
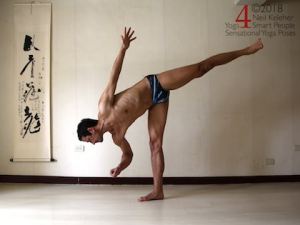
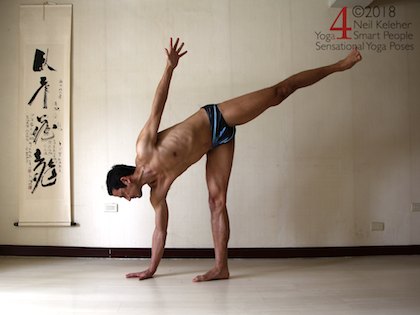
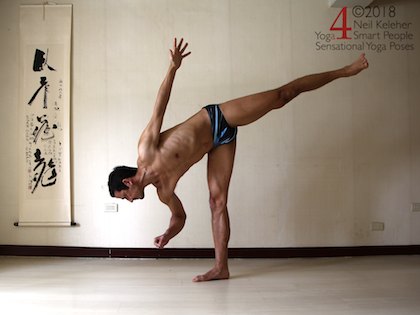
Half moon
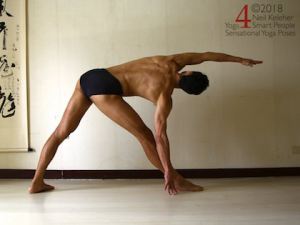
Triangle Pose
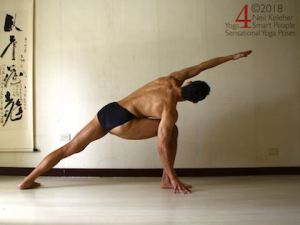
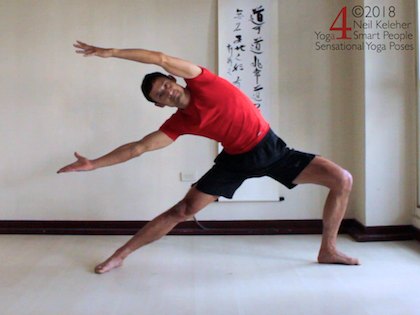
Side angle pose
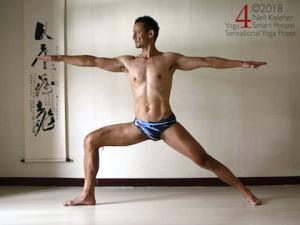
Warrior 2
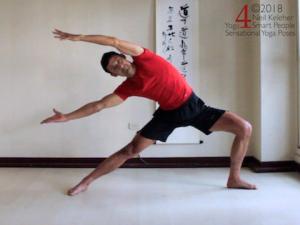
Dancing warrior
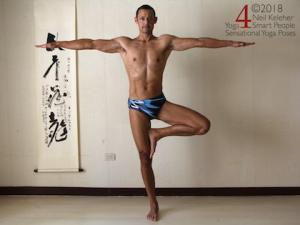
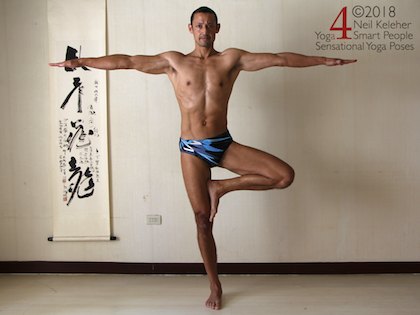
Tree pose
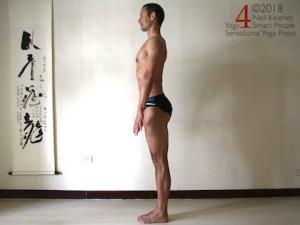
Mountain pose
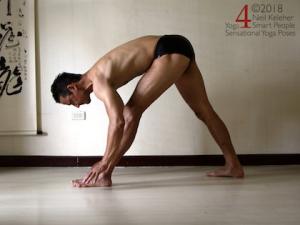
Pyramid pose
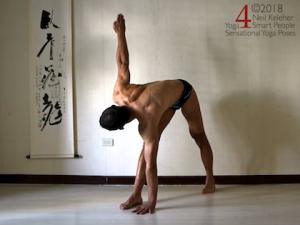
Revolving triangle pose
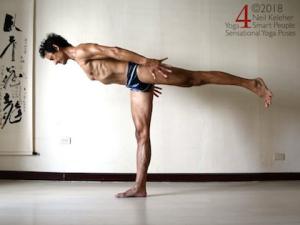
Warrior 3
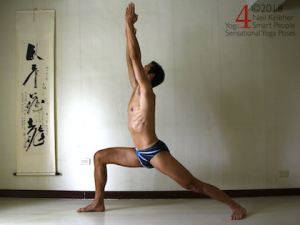
Warrior 1
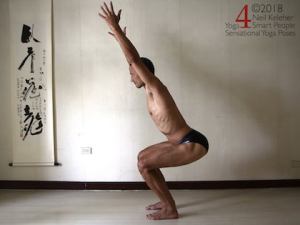
Chair pose (utkatasana)
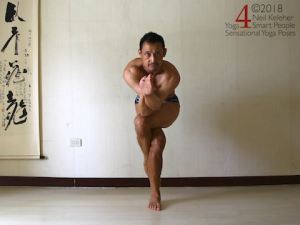
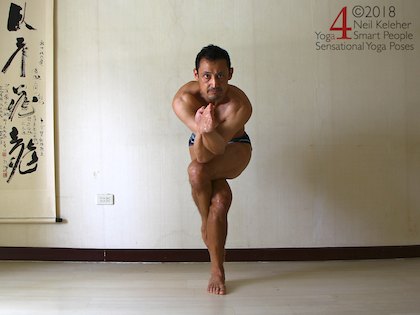
Eagle pose
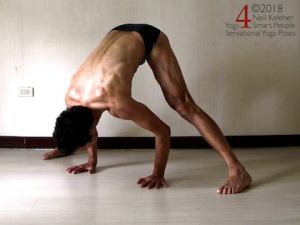
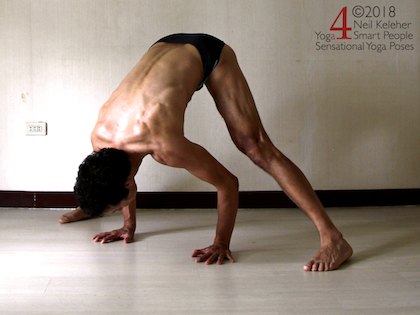
Wide leg standing forward bend
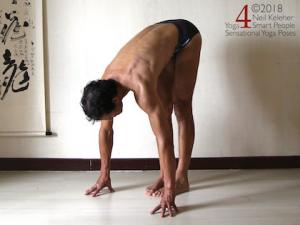
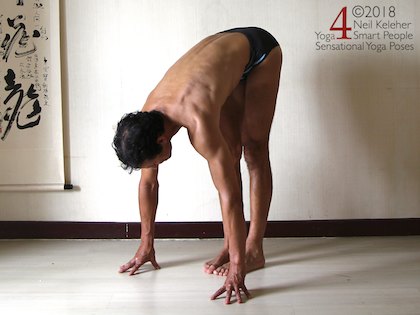
Standing forward bend
For more reasons to do standing yoga poses you can read
8 Reasons to do Standing Yoga Poses.
The standing yoga poses below have been divided into two groups, sideways or lateral standing poses, and longitudinal standing poses.
Generally the lateral poses have the "Front" leg turned out (externally rotated) relative to the pelvis.
The exception to this "guideline" is standing side bend where both feet (and knees) face forwards.
When you are just beginning yoga, it can be easier to start with lateral poses.
To protect your hips when you do standing yoga poses, it can help to feel and adjust your hip joints. Some simple hip adjustments and exercises for feeling your hips are included in basic hip adjustments for standing yoga poses
Note that some balancing on one foot poses are included here. You can read more specifically about balancing poses in yoga balance poses and specifically about balancing on one foot in balancing on one foot. For more on balance, check out the main page for the balance category: learning to balance
Because forward bending can be difficult for some students, even when standing, I'll often like to start off beginner yoga students or students with limited flexibility with lateral standing poses.
Lateral poses are generally those in which one foot, generally leading or front foot, is turned out relative to the pelvis causing the hip of that leg to be externally rotated.
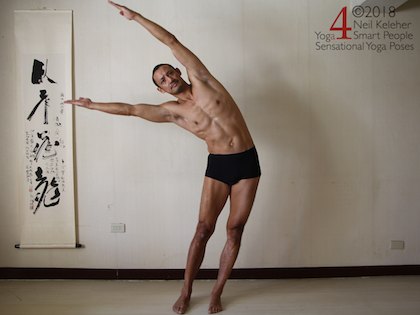
Standing Side Bend with Spine bent right and hips pushed left and arms reaching past the head.
One of my favorite lateral standing poses is standing side bend. I usually like to do this with feet parallel and either hip width or shoulder width apart. It can also be done with feet together. It could also be done with the inside foot turned out to varying degrees. This can make the inside knee more comfortable.
The two main focuses in this pose are bending the thoracic and lumbar spine to the side (that counts as one focus) and pushing the hips in the opposite direction. Some students I deal with have no experience of bending their spine sideways. Others have no concept of pushing their hips to the side (relative to their feet) and so sometimes I'll start with a spine bend and then have them push their hips to the side or I'll have them push their hips to the side and then bend their spine.
This standing yoga pose is definitely easier with the arms down and so I'll have them do it with arms down first and then have them reach their arms up, or sideways, past their ears.
One tendency for students with tight shoulders is to bend the elbow of the upper arm so I'll have them reach the upper arm straight up first and then reach it over the head while keeping the elbow straight.
Some days I'll reach the bottom arm first and then the upper arm, other days I'll do the opposite. And some days I'll have them enter the pose with arms already reaching past their ears.
One of my favorite breath synchronized actions was to have my students accentuate the push of their hips to the side (exhale) then reach their ribs and arms away from their pelvis (inhale). Then relax while keeping the side bend and then repeat. Simpler actions could focus on opening the ribcage each inhale or moving the shoulders upwards (outwards and upwards towards the ears) each inhale so that the arms feel long.
Standing up at the end of the pose I sometimes have my students reach their arms up and then touch palms without bending their elbows.
Half Moon Yoga Pose with hand touching floor and hand lifted. Note how hip is over the foot in both pictures. Also note how standing foot is turned out 90 degrees.
Often times after doing a standing side bend to one side, say bending to the right, it feels natural to me to have my students turn their right foot out ninety degrees. Then they shift weight on to their right foot, lift the left foot and place the right hand on the floor for half moon pose.
This is actually a standing balance pose.
It can be difficult to balance on one foot in this position because the thigh is externally rotated at the hip. However, with the hand on the floor the hand can be used to help making balancing easier.
To test foot stability I'll often have students lift their lower hand after first stabilizing the foot and ankle.
Another exercise I might have them do is to shift rightwards so that the hands supports some of the weight of the body. Then in order to lift the hand the students have to shift their weight off of the hand. Ideally they learn to feel when their hand is relaxed so that they know their weight is over their foot. Then, as long as their foot and ankle is stable they can lift the hand.
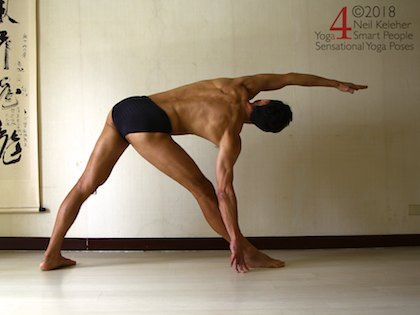
Triangle pose. Note how the pelvis is tilted to the right so that the right hip is lower than the left. With hand on the floor (or on the shin) you can use the arm to help support the weight of your upper body.
I recently read that triangle pose can cause some stress on the si joint. And so the author of that article suggests having the pelvis face downwards in this pose. My feeling is that the reason triangle pose can cause SI joint problems is that it is usually done with the bottom hand on a block or resting on the shin. The muscles that work on the pelvis, low back, SI Joint and hip then don't have to support the weight of the upper body. They can relax and be stretched.
There's nothing wrong with that if not overdone. Personally I prefer to have my hip, low back and waist muscles do some work in triangle pose. To that end I'll have students start with their bottom hand on their shin to help support their body weight. Then the exercise is to relax the lower arm and reach it to the side, along with the upper arm.
When first doing this I'll have students reach their arms on an inhale and then place their arm on their shin or on the floor or on a yoga block to rest while exhaling. I like them to do both movements slowly and smoothly.
What does the ribcage do when the arms are lifted? I like to let is sink down towards the bottom leg. Often times I'll bend the spine downwards. So bending over the left leg I'll have students bend their lumbar spine and thoracic spine to the left.
Another thing that I'll have students do as they enter the pose is drop the front leg hip. So bending towards the left, I'll have them drop the left hip so that it is lower than the right hip. Pushing the hips to the side can have a similiar affect but I find that focusing on dropping one hip makes the tilt of the pelvis deeper.
A simple breath synchronized movement is to lengthen the spine and arms while inhaling, perhaps lifting the torso slightly higher while doing so and then relaxing the ribcage downwards (letting it sink down) towards the leg while exhaling.
I also like to have students keep their arms reaching past their ears while standing back up again. If this is too difficult then they can relax the arms and work towards this type of exit.
Another option if you can reach it is to grab the big toe. You can then use the muscles of your arm against your leg for a more active posture. Read more about this version of triangle pose in Utthita trikonasana
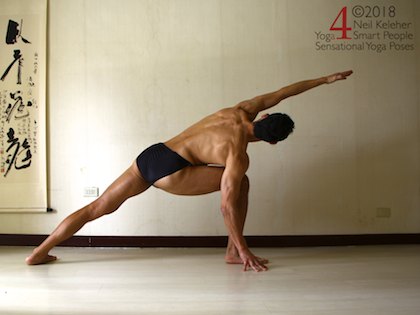
Side Angle Pose. As with triangle pose, above, notice how the pelvis is tilted to the right. If you can't get your hand to the floor in this pose, rest your forearm on your thigh instead. In either case you can press down with the hand (or forearm) to help support the weight of your upper body.
For side angle pose the feet can be separated slightly wider than in triangle pose. In this standing yoga pose the front knee is bent. To get the shin vertical and the thigh nearly horizontal the feet have to spread wider apart. In contrast, in triangle pose if the feet are spread too wide it can be difficult to keep the front of the front foot on the floor.
As with triangle pose I often have students reach both arms past the ears in this pose, or have them reach them arms on each inhale and then use the bottom arm to support the body while exhaling.
Note that for this standing yoga pose, I'll have students drop the front leg hip, then bend the knee to enter the pose. Some teachers like to keep the pelvis level from left to right, I like to tilt it. I'd suggest experimenting with both options.
For students with limited flexibility I'll have them rest their forearm on their front thigh. Students with greater flexibility can touch their hand to the floor either in front of or behind the foot. In either case (where hand is on the floor or forearm is on the thigh) I like to have students press down into the support so that the bottom shoulder is active.
To bind in side angle pose I'll have students reach their bottom elbow towards the floor. This then helps them to get their shoulder at or below the bottom of the thigh so that it is then easier to reach the bottom arm under the thigh. Sometimes I'll have the bottom hand grab the top wrist. At other times I'll do the opposite. Both have slightly different effects and I'd suggest experimenting with both.
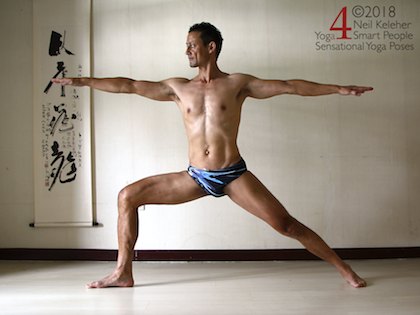
Warrior 2: In this pose the hips are level. However, you can vary that, perhaps allowing the straight leg hip to lift for hip comfort.
Warrior 2 is another lateral standing yoga pose and I must profess that I don't do it that often anymore. Traditionally arms are at shoulder height with palms facing downwards and the eyes looking over the front hand. Because the head is looking over one hand I feel like the hands should be asymmetrical also. I like to have the back palm turned up, as if holding a spear, albeit with an open palm. And I sometimes like to have the back palm at the same height as the top of the head.
Other options with this standing yoga pose for the arms include protracting the shoulder blades or retracting them. Protracting the shoulder blades will make the arms feel longer, and could go along with pushing actions like that used in side plank. However retracting the shoulder blades can be useful in pulling type motions and in this case it might be interesting to do it with closed fists, as if grabbing a rope in either hand and pulling them towards each other.
When I first learned this pose my tendency was to align the front knee first and then try to turn the hips to the side. Another option is to turn the pelvis to the side first and then try to position the front knee.
In either case be aware of any binding or "bone against bone" sensations in the front leg hip. I'd suggest trying to lift or lower the back hip (relative to the front) to find a position where the front leg hip feels more comfortable. Another option is to raise or lower the tailbone so that the pelvis tilts forwards or backwards.
I used to teach this pose in some classes and didn't much like it because it felt like it was grinding the hip of my back leg. However the more I reached with the upper body, and made the back leg feel long, the better it felt. I think my discomfort was in how to get my students to the same level of comfort.
Ways to get around hip binding of the straight leg can include adjusting the angle of the straight leg foot. In the picture above my foot is slightly turned out as opposed to turned in. (Look at the direction my back knee is pointing in if you can't quite see the angle of my foot.)
In this pose you can experiment with keeping the pelvis level from left to right. Or try tilting it towards the bent knee side, or towards the straight leg side. Bending to the right as in the picture above I'm also bending my lumbar and thoracic spine to the right. It may be helpful to press the foot of the straight leg down into the floor. This is to help activate the muscles of the straight leg so that the body is better supported.
In most of the previous standing yoga poses one thigh was externally rotated at the hip joint. The exception was standing side bend where both thighs are pointing straight ahead.
Yoga tree pose is a balancing on one foot standing yoga pose where the thigh of the lifted leg is externally rotated. And so I'll mention it here. One important difference in this pose, is that the lifted foot rests agains the inner thigh of the standing leg. Depending on how smoothly the foot is placed against and then pressed against the inner thigh can help determine how easy it is to maintain balance during the process of "connection".
If the focus is on placing the foot against the inner thigh smoothly, it can be easier to focus on staying balanced. This also gives the yogi the opportunity to feel how pressing the foot into the thigh changes tension in the standing leg thigh.
Read more about Tree pose
Longitudinal standing yoga poses are those where the main foot (or both feet such as in mountain pose, chair pose, standing forward bend, wide leg forward bend) face in the same direction as the pelvis.
One exception to this rule is standing side bend which has been included in the lateral standing poses section because it involves pushing the hips to one side relative to the feet.
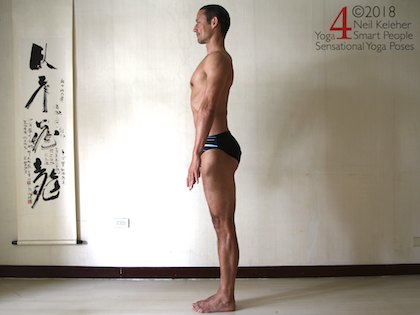
Mountain Pose could be considered a very basic yoga pose or a very advanced one. With feet together, it can be difficult to stand absolutely still. Often I'll stand with feet about hip width apart so that balance is easier.
One very basic action that you can practice while standing is making your spine feel long.
- Rather than imagining a string pulling your head up, imagine pushing your head up strongly.
- Pick a point towards the back of the top of your head so that as you push up your head stays level and your chin slightly tucked.
Focus on pushing your head up away from your ribcage so that your cervical spine not only feels straight but strong. Make your neck feel engaged..
Then gradually extend this feeling along the entire length of your spine.
The feeling is not a "grit your teeth maximum effort" strength. It should feel energizing, or at least should leave you feeling energized afterwards. An option is to lengthen your spine while inhaling and relax it while exhaling.
If you practiced reaching the arm up in the previous exercise, try lengthening your spine and then reaching your arms down.
In addition you could also work at making your legs feel long. Try to activate your legs in such a way that your feet and ankles, knees and hips all feel engaged. Or simply focus on making your legs feel long.
Working from the ground up, make your legs feel long, then your spine, then your arms.
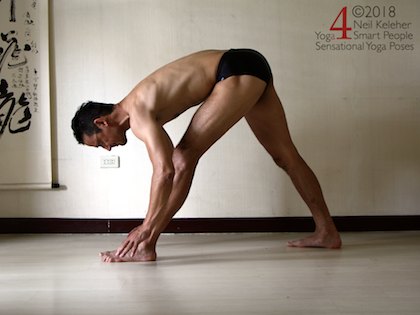 Triangle Forward Bend aka Pyramid Pose. Hands can be on the floor as shown or resting on the front shin. They could also be lifted.
The most common example of triangle forward bend is done with the hands in reverse prayer (behind the back).
I prefer a simpler version of this standing yoga pose.
I'll have students bend forwards and place their hands on the floor, or if they have limited flexibility in their hips and hamstrings then they can place their hands on yoga blocks.
Rather than holding this position I'll have them brace their front leg and/or foot and then lift their hands. To add more weight to the pose and a little more complexity I'll have them open their chest by bending their thoracic spine backwards and then have them reach their hands forwards.
For students with stability problems when they lift their hands I'll have them focus on pressing the front of their front foot into the floor prior to lifting their hands.
When I taught Ashtanga Yoga regularly I often used this as a preparation for Revolving Triangle pose.
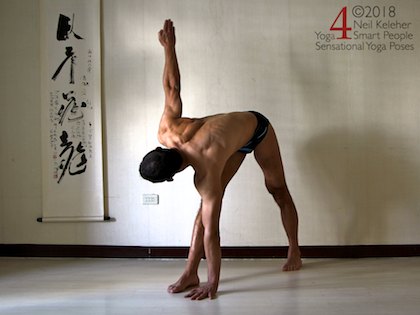
Revolved triangle with hand to the inside of the foot. If you are flexible enough you can place it on the floor to the outside of your front foot.
In Reverse Triangle (or twisted triangle or revolved triangle) a very basic alignment point is to have the hips level from left to right (and square to the front). The legs can then be used to both feel when the hips are in this position and to brace and keep the pelvis level and square. The obliques and intercostals (and even bottom arm) can then be used to drive the twist.
Based on some recently acquired anatomy knowledge I like to occasionally activate the buttock of the back leg while also activate the latissimus dorsai of the upper arm to deepen the twist. (Read more about the Thoracolumbar Fascia.)
Other ways to play in this pose include pressing the hand into the floor or pressing the front foot into the floor. This standing yoga pose (and the previous one, triangle forward bend) can be used to explore the hips by pushing the pelvis forwards or backwards or to the left or right.
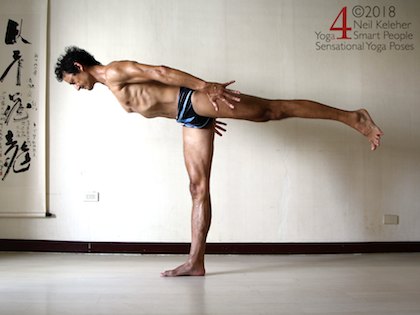
I go through stages of practicing and not practicing warrior 3. This balancing on one foot yoga pose is definitely easier when done with the arms reaching back. In this case the focus can be on making the pelvis level from left to right and orienting the back leg so that the knee points straight down.
Focusing on the standing foot I can have students work on balance and foot stability by trying to balance on their heel or by shifting weight forwards so that forefoot and toes press down with equal pressure. This pose can also be done with standing knee bent or straight. Doing it with the knee straight and then focusing on increasing the forward tilt of the pelvis turns this pose into a hamstring stretch for the supporting leg. In addition, activating the spinal erectors as if increasing the backwards bend of the lumbar spine may give the hamstrings and glute of the lifted leg a foundation from which to act. In addition it may also give them room to contract. In both cases tilting the pelvis forwards may make it easier to use the muscles at the back of the lifted leg.
If reaching the arms forwards, I like to drop the arms first and spread the shoulder blades (protract) and then reach the arms forwards while keeping an open feeling between the shoulder blades. For extra sensation try to touch the hands together and keep them touching without interlocking the thumbs and/or fingers.
Generally if I am teaching a string of standing poses I prefer to alternate bent knee poses with straight knee poses. Or I'll do both sides of a pose before moving on to the next pose. This is because I often like to have my students focus on feeling and controlling their body. This can be easier if their muscles aren't too tired.
But another way to create a rest in difficult poses (particularly standing yoga poses) is learning to activate different muscles while in the pose.
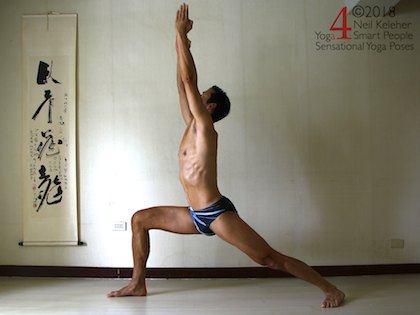
And so in Warrior 1, I may have students try alternately activating the quadriceps and hamstrings of their front leg.
(For tips on how to avoid shoulder impingement in arm over head poses like warrior 1, read about Virabhadrasana (another name for Warrior pose)).
A simpler exercise is to start with the front leg straight and bend it while inhaling and stressing it while exhaling. In this case the focus can be on lengthening the spine and arms while bending the knee and then relaxing both while straightening the knee. Then the focus can be on alternately lengthening and relaxing the spine and arms while keeping the front knee bent.
When I first started doing this pose I used to be fairly uptight about keeping the hips square to the front. I then only went as low as I could keep my hips square to the front. I then learned how to brace my front foot so that I could relax my hips and use body weight to turn my hips square to the front while getting my front shin vertical and thigh horizontal.
Nowadays I tend to focus less on the external shape of the pose and more on specific muscle actions and bone positioning so that the pose feels strong and open from the inside.
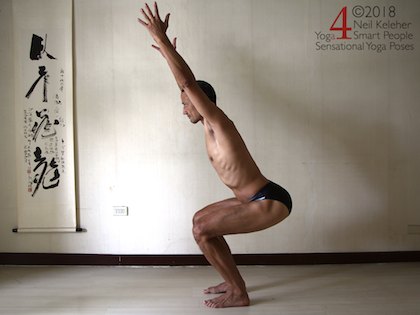
Because chair poseis a bent knee pose I'll often follow it with standing side bend or standing forward bend to give the legs a rest.
Traditionally chair pose, or utkatasana is taught with feet touching, which is great for balance. I prefer to teach it with feet hip width. And to make balance easier I also like to have students reach their arms forwards. Simple instructions for entering the pose are to push the hips back and then bend the knees (and then reach the arms forwards).
This is another pose in which I'll have students play with activating quadriceps or hamstrings or buttocks.
Also for students who have problems with balancing I'll have them practice shifting weight forwards and backwards while standing. Then the goal can be to keep even pressure through the forefeet and heels while bending the knees. This can be accomplished by reaching the chest forwards as the hips reach back.
In most of the forward facing standing yoga poses one or both knees point forwards. For this reason it seems reasonable to mention eagle pose with this group of poses. It too is a balancing on one foot yoga pose with the added challenge of having both the arms and legs crossed.
With beginners I'll often teach the Eagle Pose arm position separately from the leg position and then put the two positions together.
Note that once the legs are locked in this pose, it can actually become easier because the leg lock helps to keep the body in position. And so even though it is a bent leg pose, if the legs can be bound it can be a sort of resting pose once you get the legs bound.
I tend to do this pose after with other spread leg standing poses like triangle or wide angle pose. With hands on the floor as shown in the picture, this pose is also called prasaritta padotanasana A. (A variation with the hands clasped behind the back is called prasarita padottanasana C)
For people with forward bending challenges I would suggest using this (as well as triangle forward bend) as a preparation for the standing forward bend that follows.
I'll often have students practice pressing their hands forwards against the floor so that the chest is pushed towards the legs. Leg actions that can be played with in this standing yoga pose can include activating the quadriceps or the hamstrings.
In the picture I'm looking down towards the floor. Students could also choose to look back between the legs, or even up, towards the buttocks.
This pose could also be turned into a twist with either a hand or an elbow on the floor and the other hand reaching upwards.
Variations of this pose are included in Standing Hamstring Stretches.
Traditionally variations of this pose include grabbing the big toes (padangusthasana) and placing the hands, palms facing upwards, beneath the feet.
I tend to teach the simplest version of the standing forward bend, hands flat on the floor (or on yoga blocks or a chair) with the feet hip width or shoulder width apart for beginners.
(That being said, there are lots of options for doing the standing forward bend. Check out standing forward bend to read about some of those options!)
Some very simple actions I like to use when doing this pose include shifting weight backwards and forwards. In this case I'll have hands positioned in front of the feet as opposed to beside them.
This can be used as training for Yoga Balance Poses by learning to feel when the hands are supporting some body weight and when the weight of the body is entirely over the feet.
A variation is to keep the hands off of the floor and rock forwards and backwards. Keeping with a common theme, I may have them practice activating quadriceps and hamstrings while in this pose.
As with wide leg forward bend, I may have students focus on pressing their hands forwards against the floor.
Another favorite forward bend variation is to shift weight to one foot while bent forwards. The other foot lifts. The exercise is then, with both knees straight, to bring the lifted leg forwards. This forces the student to learn to use their hip flexors.
Rather than holding, I'll have them relax and repeat while keeping the foot lifted. For extra challenge and to turn this into more of a balancing on one foot exercise I'll have students lift their hands after flexing their lifted hip.
This is then a good point from which to move into seated yoga poses.
Published: 2017 08 22
Updated: 2021 02 09
